


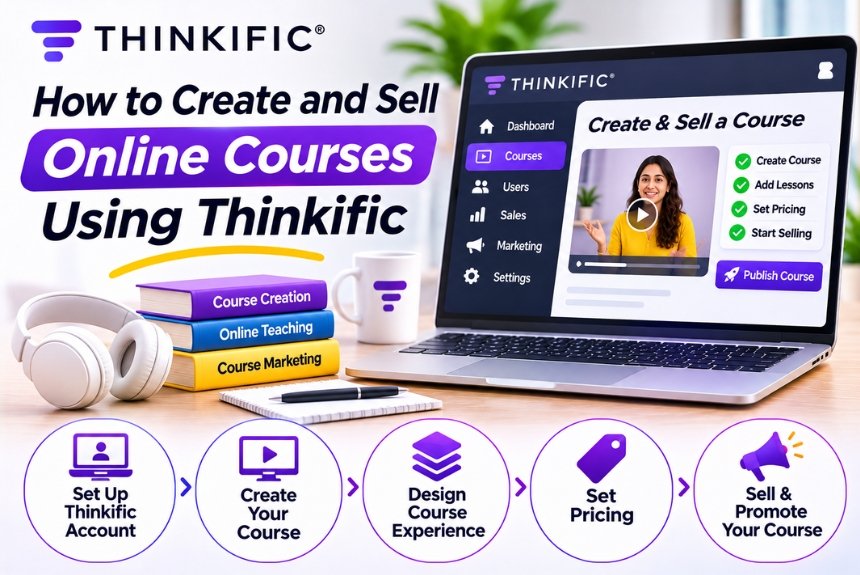
How to Create and Sell Online Courses Using Thinkific
Selling online courses has become an effective way for educators, entrepreneurs, coaches, and professionals to monetize their knowledge. Whether you want to teach digital marketing, graphic design, business management, programming, or personal development, an online course allows you to reach students beyond geographical boundaries.
However, turning your expertise into a profitable online course requires more than recording videos and uploading them to a website. You need to develop a structured curriculum, create engaging lessons, choose the right pricing model, build a sales page, and implement a marketing strategy.
Thinkific is an online course platform that simplifies this process by providing tools for course creation, website building, student management, payments, and educational product sales.
In this guide, we will explain how to create and sell online courses using Thinkific, from choosing your course topic to launching your product and generating sales.
Whether you are creating your first course or expanding an existing educational business, this tutorial will help you build a practical and sustainable course-selling strategy.
Why Choose Thinkific to Create and Sell Online Courses?
Thinkific provides a centralized platform for developing and selling educational products without requiring extensive technical knowledge.
Instead of building a learning website from scratch, you can use its course builder, website tools, and selling capabilities to establish your online education business.
Key Benefits of Using Thinkific
| Benefit | Explanation |
| Easy Course Creation | Organize lessons and educational materials |
| Website Builder | Create a branded online academy |
| Video-Based Learning | Deliver lessons through video content |
| Student Management | Manage enrollments and learners |
| Assessments | Evaluate student understanding |
| Payment Capabilities | Sell educational products through supported payment options |
| Marketing Tools | Promote courses and manage sales |
| Learning Communities | Encourage student interaction through supported features |
| Analytics | Monitor course performance and business metrics |
| Hosted Platform | Reduce technical maintenance requirements |
Thinkific is particularly useful for creators who want to focus on education, content development, and marketing rather than managing website infrastructure.
Explore our Thinkific Complete Tutorial for a broader overview of the platform.
Step 1: Choose a Profitable Online Course Topic
Before creating your course, identify a topic that combines your expertise, audience demand, and commercial potential.
A common mistake beginners make is creating a course based only on personal interest without researching whether people are willing to pay to learn that subject.
How to Find the Right Course Topic
1. Identify Your Expertise
Start by listing the subjects you understand well or have practical experience in.
Consider your professional skills, hobbies, qualifications, and experiences that could help others solve a problem.
For example:
- Digital marketing
- Search engine optimization
- Graphic design
- Website development
- Business management
- Financial literacy
- Photography
- Programming
- Language learning
- Personal development
2. Research Audience Problems
Identify the challenges your potential students are trying to solve.
You can research audience questions through:
- Google search suggestions
- Online forums
- Reddit discussions
- YouTube comments
- Social media communities
- Keyword research tools
- Competitor course reviews
Look for recurring problems that people want practical solutions for.
3. Validate Your Course Idea
Before investing significant time in course production, validate the demand.
You can:
- Conduct surveys
- Interview potential learners
- Publish educational content
- Offer a free workshop
- Create a landing page
- Build an email waiting list
- Test interest through social media
A validated course idea reduces the risk of creating a product that struggles to attract students.
Step 2: Define Your Target Audience
A course designed for a specific audience is easier to position and promote than a generic educational product.
Instead of targeting everyone interested in marketing, define a more focused group.
| Broad Audience | More Specific Audience |
| Digital Marketers | Beginners Learning Digital Marketing |
| Business Owners | Small Business Owners Learning SEO |
| Designers | Beginners Learning Canva |
| Entrepreneurs | First-Time Online Business Owners |
| Students | Students Preparing for Digital Marketing Careers |
| Developers | Beginners Learning WordPress Development |
Create a Student Profile
Before developing your curriculum, answer these questions:
- Who is your ideal student?
- What is their current skill level?
- What problem are they facing?
- What do they want to achieve?
- What prevents them from achieving it?
- How much time can they dedicate to learning?
- What type of educational content do they prefer?
These answers will help you create a course that addresses real learning needs.
Step 3: Define Your Course Learning Outcomes
Once you have chosen a topic and audience, determine what students should achieve after completing your course.
Learning outcomes provide direction for your curriculum and help communicate the value of your educational product.
Example: Digital Marketing Course
By the end of the course, students should be able to:
- Understand digital marketing fundamentals.
- Conduct keyword research.
- Develop a content marketing strategy.
- Create and optimize website content.
- Set up basic advertising campaigns.
- Understand social media marketing.
- Analyze marketing performance.
- Develop a practical digital marketing plan.
Clearly defined outcomes make your course more focused and easier to promote.
Step 4: Create Your Course Curriculum
A structured curriculum ensures that students can progress logically from foundational concepts to practical applications.
Thinkific allows you to organize your educational content into chapters and lessons.
Example Course Curriculum
| Module | Topics |
| Module 1: Introduction | Course overview and learning objectives |
| Module 2: Fundamentals | Essential concepts and terminology |
| Module 3: Tools and Resources | Software, platforms, and techniques |
| Module 4: Practical Implementation | Step-by-step demonstrations |
| Module 5: Real-World Projects | Exercises and case studies |
| Module 6: Advanced Strategies | Optimization and advanced concepts |
| Module 7: Final Project | Applying the complete learning process |
| Conclusion | Summary and next steps |
Tips for Creating an Effective Curriculum
Keep Lessons Focused
Each lesson should explain one specific concept or skill.
Avoid combining too many unrelated topics in a single video.
Follow a Logical Sequence
Students should understand the fundamentals before moving to advanced topics.
Include Practical Exercises
Assignments, demonstrations, and real-world examples help students apply what they learn.
Avoid Unnecessary Content
Every lesson should contribute to the course’s learning objectives.
A well-designed curriculum improves student satisfaction and can encourage positive reviews and referrals.
Step 5: Prepare Your Course Content
Once your curriculum is ready, begin producing educational materials.
Your content should be engaging, informative, and easy to understand.
Types of Content You Can Create
| Content Type | Best Use |
| Video Lessons | Demonstrations and explanations |
| Screen Recordings | Software tutorials and workflows |
| Text Lessons | Written explanations and reference material |
| Presentations | Visual explanations of concepts |
| Worksheets | Practical exercises |
| Templates | Ready-to-use resources |
| Quizzes | Knowledge assessment |
| Assignments | Practical application |
| Case Studies | Real-world learning examples |
How to Create Professional Course Videos
1. Write a Script or Outline
Prepare a clear outline before recording.
You do not necessarily need to memorize a complete script, but you should know the key points you want to explain.
2. Use Clear Audio
Audio quality is often more important than expensive video equipment.
Use a suitable microphone and record in a quiet environment.
3. Maintain Good Lighting
Ensure that your face, presentation, or demonstration is clearly visible.
4. Record in a Suitable Resolution
Use a video resolution that provides a clear viewing experience without creating unnecessarily large files.
5. Edit Your Videos
Remove unnecessary pauses, mistakes, and distractions.
Add captions, visual explanations, or screen demonstrations where they improve understanding.
6. Keep Lessons Manageable
Shorter, focused lessons are often easier for students to complete than lengthy videos covering multiple topics.
Step 6: Create Your Online Course Using Thinkific
Now that your course content is ready, you can begin building your course inside Thinkific.
1. Sign Up for Thinkific
Visit the official Thinkific website and create an account.
Depending on the current offering, you may be able to explore the platform through a trial or introductory option.
After logging in, access your administrative dashboard.
2. Set Up Your Online Academy
Configure your academy’s basic information.
Add:
- Academy name
- Logo
- Brand colors
- Website details
- Domain settings
- Business information
A consistent brand identity helps create a professional learning environment.
3. Create a New Course
Navigate to the course creation area and start a new course.
Enter your course title and description.
Choose a title that communicates the subject and learning outcome rather than simply naming a broad topic.
4. Add Chapters and Lessons
Organize your course curriculum into chapters and individual lessons.
For example:
Chapter 1: Introduction to SEO
- What Is SEO?
- How Search Engines Work
- Understanding Search Intent
- SEO Ranking Factors
Chapter 2: Keyword Research
- Introduction to Keyword Research
- Search Volume and Keyword Difficulty
- Long-Tail Keywords
- Competitor Keyword Analysis
This structure makes it easier for students to navigate the learning experience.
5. Upload Your Educational Content
Add your prepared videos, presentations, documents, and supporting resources.
Review each lesson to ensure that the content is organized correctly and provides clear instructions.
6. Add Assessments
Use available assessment tools to evaluate student understanding.
You can incorporate quizzes or other supported assessment formats where appropriate.
7. Preview Your Course
Before publishing, review the course from a student’s perspective.
Check:
- Lesson order
- Video playback
- Course descriptions
- Downloadable materials
- Navigation
- Assessment instructions
- Mobile usability
A final review helps identify problems before students enroll.
For a broader walkthrough of Thinkific’s features, read our Thinkific Complete Tutorial.
Step 7: Build a High-Converting Course Sales Page
Your sales page is one of the most important elements of your online course business.
It explains the value of your course and encourages visitors to purchase it.
Essential Elements of a Course Sales Page
1. Compelling Headline
Communicate the primary benefit of your course.
Example: Learn SEO From Scratch and Build a Search-Optimized Website.
2. Clear Introduction
Explain the problem your course solves and why it matters.
3. Learning Outcomes
Describe what students will be able to do after completing the course.
4. Course Curriculum
Show the modules and topics included in the course.
5. Target Audience
Explain who should enroll and what skill level is required.
6. Instructor Introduction
Share your professional background, experience, and relevant qualifications.
7. Testimonials
Include genuine feedback from students or customers, if available.
8. Pricing and Benefits
Explain the pricing structure and what students receive.
9. Frequently Asked Questions
Address common concerns about the course, access, requirements, and learning experience.
10. Call to Action
Use clear enrollment buttons such as:
- Enroll Now
- Start Learning
- Join the Course
- Get Instant Access
Your sales page should focus on the value students receive rather than relying on exaggerated promises.
Step 8: Set the Right Price for Your Online Course
Pricing affects your revenue, positioning, and ability to attract students.
There is no universal course price that works for every audience or subject.
Common Online Course Pricing Models
| Pricing Model | Description | Suitable For |
| Free Course | No payment required | Lead generation and audience building |
| Low-Cost Course | Affordable introductory product | Beginners and smaller topics |
| Standard Course | One-time payment | Structured educational programs |
| Premium Course | Higher-priced educational product | Specialized training and advanced skills |
| Membership | Recurring payment | Continuous learning and ongoing content |
| Course Bundle | Multiple courses sold together | Comprehensive learning programs |
The availability of particular payment and membership options depends on Thinkific’s current features and plan.
Factors That Influence Course Pricing
Course Depth
A comprehensive course with detailed lessons and practical resources may provide more value than a short introductory course.
Target Audience
Professional learners and businesses may have different purchasing expectations from casual learners.
Learning Outcomes
Courses that teach practical, career-relevant, or business-related skills may offer stronger perceived value.
Instructor Expertise
Relevant professional experience and demonstrated expertise can influence purchasing decisions.
Market Competition
Research comparable courses to understand how similar products are positioned.
Additional Support
Live sessions, feedback, mentoring, or other services can influence pricing when genuinely included.
Example Course Revenue Calculation
Suppose you sell an online course for ₹4,999.
| Metric | Example |
| Course Price | ₹4,999 |
| Students Enrolled | 50 |
| Gross Revenue | ₹2,49,950 |
| Platform Subscription | Deduct applicable cost |
| Payment Processing | Deduct applicable charges |
| Refunds and Taxes | Account for applicable amounts |
| Net Revenue | Calculate after expenses |
This is an illustrative calculation, not a guaranteed earnings forecast.
Your actual revenue depends on sales volume, marketing expenses, subscription costs, payment processing, refunds, and applicable taxes.
Step 9: Configure Payment Options
Before selling your course, configure the supported payment methods.
Thinkific provides payment-related functionality, but available payment gateways, currencies, fees, and payout options may vary depending on your location and eligibility.
Payment Setup Checklist
- Review supported payment providers.
- Confirm your business and payment information.
- Check available currencies.
- Review transaction and processing fees.
- Understand payout schedules.
- Configure refund policies.
- Review applicable tax requirements.
- Test the checkout experience.
Always verify the current payment terms before launching your course.
Step 10: Launch Your Online Course
Once your course is ready, you can publish it and begin accepting enrollments.
However, publishing alone is not a complete launch strategy.
Create a Course Launch Plan
Before Launch
- Complete the curriculum.
- Review all lessons.
- Test the enrollment process.
- Prepare your sales page.
- Set up analytics.
- Create promotional content.
- Build an email list.
- Prepare launch announcements.
During Launch
- Publish educational content.
- Announce the course to your audience.
- Share course benefits.
- Conduct webinars or demonstrations.
- Answer prospective students’ questions.
- Use appropriate promotional offers.
- Monitor sales and enrollment activity.
After Launch
- Collect student feedback.
- Monitor course engagement.
- Identify areas for improvement.
- Update lessons when necessary.
- Continue publishing supporting content.
- Develop additional educational products.
A structured launch helps you establish a repeatable process for future courses.
Step 11: Promote Your Online Course Using SEO
Search engine optimization can help you attract potential students who are actively looking for educational resources.
Instead of relying entirely on paid advertising, you can develop a content strategy that generates organic traffic over time.
1. Conduct Keyword Research
Identify search queries related to your course topic.
For example, if you are selling a WordPress course, relevant keywords might include:
- WordPress tutorial for beginners
- How to create a WordPress website
- WordPress website development course
- Learn WordPress online
- WordPress training for beginners
Use keyword research tools to identify search demand and understand the intent behind each query.
2. Optimize Your Course Page
Include relevant keywords naturally in:
- Page title
- Main headline
- Course description
- Subheadings
- Image alt text
- URL slug
Avoid keyword stuffing and focus on providing useful information.
3. Publish Supporting Blog Content
Create articles that answer questions related to your course topic.
For example, a digital marketing academy could publish guides on SEO, email marketing, social media marketing, analytics, and paid advertising.
Connect relevant articles to your course landing page using descriptive anchor text.
4. Create Free Educational Resources
Free tutorials, checklists, templates, and introductory lessons can attract potential students.
These resources allow visitors to experience your teaching style before purchasing a course.
5. Build Topic Authority
Publish comprehensive content covering different aspects of your subject.
A consistent content strategy can help establish your brand as a valuable educational resource.
6. Monitor Search Performance
Use analytics and SEO tools to monitor organic traffic, engagement, and course conversions.
Update your content regularly to keep it accurate and useful.
Step 12: Use Email Marketing to Generate Course Sales
Email marketing can help you build relationships with potential students and promote your educational products.
Instead of relying only on social media algorithms, you can develop an audience that receives your content directly.
How to Build an Email List
You can offer a free educational resource in exchange for a voluntary subscription.
Examples include:
- Free introductory lessons
- Downloadable ebooks
- Checklists
- Templates
- Webinars
- Educational newsletters
- Mini-courses
Example Email Marketing Funnel
| Stage | Email Strategy |
| Signup | Deliver the free resource |
| Introduction | Introduce yourself and your expertise |
| Education | Share helpful educational content |
| Problem Awareness | Explain common audience challenges |
| Solution | Introduce your course |
| Promotion | Share course benefits and enrollment details |
| Follow-Up | Answer questions and address concerns |
Use relevant email marketing tools to manage subscribers and automate communication where appropriate.
Explore our Best Email Marketing Software guide to compare available platforms.
Step 13: Use Social Media to Promote Your Course
Social media can help you reach potential students, demonstrate expertise, and build an audience.
Choose platforms based on where your target audience spends time.
| Platform | Potential Use |
| YouTube | Tutorials and educational videos |
| Short-form educational content | |
| Professional training and business education | |
| Communities and audience engagement | |
| TikTok | Short educational demonstrations |
| Visual educational resources and discovery |
Social Media Content Ideas
- Quick educational tips
- Common mistakes in your subject
- Step-by-step tutorials
- Before-and-after demonstrations
- Course previews
- Student success stories, with permission
- Frequently asked questions
- Short explanations of complex concepts
Focus on helping your audience rather than publishing promotional content exclusively.
Step 14: Improve Student Engagement and Course Completion
Creating a course is not enough. Students must be able to learn effectively and complete the educational experience.
Strategies to Improve Engagement
Provide Clear Instructions
Explain what students should do before, during, and after each lesson.
Break Lessons Into Smaller Units
Focused lessons can help students learn without feeling overwhelmed.
Include Practical Exercises
Encourage students to apply concepts through assignments, demonstrations, and projects.
Create Learning Communities
Where supported, use communities and discussions to encourage interaction.
Offer Supporting Resources
Templates, worksheets, and reference materials can help students apply their learning.
Collect Feedback
Ask students what they found helpful and what could be improved.
Update Your Content
Keep lessons accurate and relevant, particularly when teaching software, tools, or rapidly changing industries.
Step 15: Track Your Course Performance
Monitoring performance helps you identify opportunities to improve your course and marketing strategy.
Important Metrics to Monitor
| Metric | Why It Matters |
| Course Sales | Measures revenue generation |
| Student Enrollment | Tracks demand |
| Conversion Rate | Evaluates sales page effectiveness |
| Course Completion | Measures learning engagement |
| Student Progress | Helps identify engagement patterns |
| Refund Rate | May reveal product or customer experience issues |
| Email Signup Rate | Evaluates lead generation |
| Marketing Revenue | Measures campaign effectiveness |
| Customer Feedback | Identifies opportunities for improvement |
Review these metrics regularly rather than focusing only on the number of sales.
A course with strong enrollment but low completion may require improvements to its content or learning experience.
Common Mistakes to Avoid When Selling Online Courses
Many course creators struggle because they focus too heavily on content production and neglect the business side of online education.
1. Creating a Course Without Validating Demand
Research your target audience and validate your course idea before investing significant resources.
2. Targeting Too Broad an Audience
A course designed for a specific learner is easier to position and promote.
3. Overloading Students With Content
More lessons do not automatically mean more value.
Focus on practical outcomes and clear explanations.
4. Ignoring Marketing
Develop a marketing strategy before launching your course.
Build an audience through content, email, social media, and relevant partnerships.
5. Choosing the Wrong Pricing Strategy
Consider your audience, course value, business expenses, and market positioning before setting a price.
6. Neglecting Student Support
Respond to student questions and address problems with course materials.
7. Failing to Update the Course
Educational content should evolve as tools, technology, and industry practices change.
8. Relying on a Single Traffic Source
Diversify your marketing channels to reduce dependency on a single platform.
Frequently Asked Questions
1. Can Beginners Create and Sell Courses Using Thinkific?
Yes. Thinkific is designed to help beginners create and sell online courses without extensive technical knowledge. Its course builder and hosted platform simplify the process.
2. Do I Need Coding Skills to Use Thinkific?
No. You can create courses and build an online academy using its interface. Advanced customization requirements may involve additional tools or technical work.
3. Can I Sell Multiple Courses on Thinkific?
Thinkific supports creating and selling multiple educational products, subject to the limits and capabilities of your selected plan.
4. Can I Sell Courses Without a Website?
Thinkific provides website-building capabilities, so you do not necessarily need to create a separate website. You can use its academy website to showcase and sell your courses.
5. How Much Money Can I Make Selling Online Courses?
There is no guaranteed income. Your revenue depends on course pricing, audience size, demand, conversion rates, marketing effectiveness, expenses, and student retention.
6. Can I Offer Free Courses on Thinkific?
Thinkific supports free educational offerings through its available product and enrollment options. Free courses can help attract learners and introduce them to your teaching style.
7. Can I Sell Courses Internationally?
International sales depend on supported payment methods, currencies, eligibility, and applicable regulations. Review Thinkific’s current payment documentation before targeting international students.
8. Is Thinkific Better Than Teachable?
Both platforms offer course creation and selling capabilities. Thinkific may appeal to creators who prioritize structured educational experiences, while Teachable may suit those seeking a streamlined course-selling platform. Compare their current features and pricing.
9. Can I Use Thinkific for Business Training?
Yes. Thinkific can support business training and educational programs. Organizations should evaluate available administration, reporting, and management features before selecting a solution.
10. How Do I Promote My Thinkific Course?
You can promote your course through SEO, blog content, email marketing, YouTube, social media, webinars, partnerships, and paid advertising. A diversified marketing strategy helps attract potential students.
Final Thoughts
Creating and selling online courses using Thinkific provides an opportunity to turn your expertise into a digital educational business.
The platform simplifies course creation, website building, student management, and selling, allowing creators to focus on developing valuable learning experiences.
However, building a successful course business requires more than selecting the right platform. You need to understand your audience, validate your course topic, develop a practical curriculum, establish a suitable pricing strategy, and implement a consistent marketing plan.
The best approach is to start with a focused course, validate demand, deliver meaningful learning outcomes, and improve your educational product based on student feedback.
Ready to create your online course? Visit Thinkific to explore its current features and start building your online academy.
Leave a Reply