


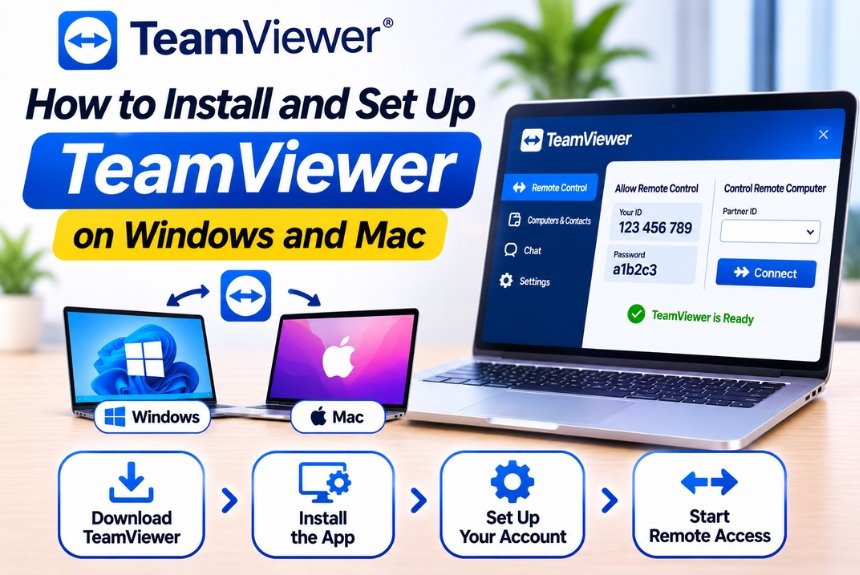
How to Install and Set Up TeamViewer on Windows and Mac
Remote access software has become an essential tool for individuals, businesses, IT professionals, and remote workers. Whether you want to access your office computer from home, help someone troubleshoot a technical issue, or transfer files between devices, remote desktop applications make the process convenient.
TeamViewer is one of the most popular remote access solutions available. It allows users to connect to computers remotely, share screens, transfer files, and provide technical support over the internet.
However, before using TeamViewer, you need to download, install, and configure it properly on your device.
In this guide, we will explain how to install and set up TeamViewer on Windows and Mac, including downloading the software, completing installation, creating an account, configuring remote access, enabling security settings, and troubleshooting common installation problems.
Whether you are a beginner or a professional, this tutorial will help you get TeamViewer running smoothly.
What Is TeamViewer?
TeamViewer is remote access and remote support software that allows users to connect to and control supported computers and devices from different locations.
It establishes remote connections over the internet, enabling users to access another computer without being physically present.
What Can You Do with TeamViewer?
After installing TeamViewer, you can:
- Remotely control another computer.
- Access your personal or office computer.
- Provide technical support.
- Share your screen with another person.
- Transfer files between devices.
- Configure unattended remote access.
- Manage supported devices.
- Troubleshoot software and operating system problems.
System Requirements Before Installation
Before downloading TeamViewer, make sure your computer meets the requirements for the version you intend to install.
| Requirement | Windows | Mac |
| Operating System | Supported Windows versions | Supported macOS versions |
| Processor | Compatible processor | Compatible Apple or Intel processor |
| RAM | Sufficient memory for normal operation | Sufficient memory for normal operation |
| Internet | Required for remote connectivity | Required for remote connectivity |
| Storage | Available space for installation | Available space for installation |
| Permissions | Administrator permissions may be required | Permission to install applications |
| Security | Firewall configuration may be necessary | Privacy permissions may be necessary |
Check TeamViewer’s official documentation for the latest operating system compatibility information before installing.
How to Download TeamViewer
The first step is to download the official TeamViewer installation file.
Official download page: Download TeamViewer
Steps to Download TeamViewer
- Open Google Chrome, Microsoft Edge, Safari, or another browser.
- Visit the official TeamViewer website.
- Navigate to the Download section.
- Select your operating system.
- Choose the appropriate TeamViewer application.
- Click the download button.
- Wait for the installation file to download.
Important: Always download TeamViewer from its official website or a trusted application store. Avoid unofficial installers and modified versions.
How to Install TeamViewer on Windows
Installing TeamViewer on Windows is straightforward. Follow these steps to complete the installation.
Step 1: Open the Downloaded Installer
After downloading TeamViewer:
- Open the Downloads folder.
- Locate the TeamViewer installation file.
- Double-click the downloaded .exe file.
- Wait for the installation window to appear.
If Windows displays a User Account Control prompt, review it and select Yes if you want to proceed with the installation.
Step 2: Choose the Installation Option
The installer may display different options depending on the TeamViewer version.
Common options include:
- Install TeamViewer on this computer.
- Run TeamViewer without installation.
- Select the intended usage type.
Choose the installation option if you plan to use TeamViewer regularly.
The portable or run-only option may be useful for temporary access, depending on the version and available functionality.
Step 3: Select the Usage Type
TeamViewer may ask how you intend to use the application.
Select the appropriate option based on your actual usage:
- Personal use
- Commercial use
- Other available licensing options
This selection is important because TeamViewer’s licensing terms distinguish between personal and commercial usage.
Step 4: Accept the License Agreement
Review the required license and privacy information.
If you agree to the applicable terms, select the required checkboxes and continue.
Step 5: Complete the Installation
- Click the installation button.
- Wait for the installation process to finish.
- Allow the installer to complete any required configuration.
- Click Finish or the corresponding completion button.
TeamViewer should now be installed on your Windows computer.
Step 6: Launch TeamViewer
After installation:
- Open the Start menu.
- Search for TeamViewer.
- Click the application.
- Wait for the main interface to load.
You should now see your TeamViewer connection information and remote access options.
How to Set Up TeamViewer on Windows
Once TeamViewer is installed, you need to configure it before establishing remote connections.
Step 1: Check Your TeamViewer ID
Open TeamViewer and locate the section displaying your device’s connection information.
Your TeamViewer ID identifies your device for supported connection methods.
Keep this information available when connecting to another computer, but share it only with people you trust.
Step 2: Configure Remote Access
To connect to another computer:
- Open TeamViewer.
- Locate the remote connection field.
- Enter the other computer’s TeamViewer ID.
- Select Remote Control.
- Click Connect.
- Enter the required password or authentication information.
- Wait for the connection to establish.
Once connected, you should be able to view and interact with the remote computer according to the permissions granted.
Step 3: Create a TeamViewer Account
Creating an account can help you manage your devices and access additional features.
To create an account:
- Open TeamViewer.
- Select Sign In or the account option.
- Click Create Account if you do not already have one.
- Enter your email address.
- Create a secure password.
- Complete any required verification.
- Sign in to your account.
Step 4: Configure Unattended Access
Unattended access is useful when you want to connect to your computer without requiring someone to manually accept each session.
To configure it:
- Open TeamViewer on the computer you want to access.
- Sign in to your TeamViewer account.
- Navigate to the remote access or device management settings.
- Locate the unattended access configuration.
- Follow the instructions to assign or authorize the device.
- Set up secure authentication.
- Save the configuration.
- Test the connection from another device.
The available options may differ depending on the installed version and license.
Step 5: Configure Security Settings
Remote access provides control over another computer, so security should be a priority.
Recommended settings include:
- Enable two-factor authentication.
- Use strong passwords.
- Restrict access to trusted devices.
- Review account permissions.
- Keep TeamViewer updated.
- Remove devices you no longer use.
- Avoid sharing authentication credentials.
- Review active sessions and access settings.
How to Install TeamViewer on Mac
Installing TeamViewer on macOS involves downloading the appropriate installer and granting the permissions required for remote access.
Step 1: Download TeamViewer for Mac
- Open Safari or another web browser.
- Visit the official TeamViewer download page.
- Select macOS as your operating system.
- Download the compatible installation package.
- Wait for the download to finish.
The downloaded file may be provided as a disk image or another installation format, depending on the version.
Step 2: Open the Installation File
- Navigate to your Downloads folder.
- Locate the TeamViewer installation file.
- Double-click the downloaded file.
- Follow the instructions displayed by the installer.
If macOS asks you to confirm that you want to open the application, review the prompt and proceed only if you downloaded it from the official source.
Step 3: Install TeamViewer
Depending on the installer format:
- Open the installation package.
- Follow the setup instructions.
- Enter your Mac administrator password if requested.
- Allow the installation process to complete.
- Close the installer after successful installation.
Step 4: Launch TeamViewer
After installation:
- Open Finder.
- Navigate to the Applications folder.
- Locate TeamViewer.
- Double-click the application.
- Wait for the interface to load.
TeamViewer should now be ready for initial configuration.
How to Set Up TeamViewer on Mac
Unlike Windows, macOS requires users to grant specific privacy permissions before remote control functionality can work correctly.
Step 1: Open TeamViewer
Launch TeamViewer from the Applications folder.
Sign in to your account if required and review the available connection options.
Step 2: Grant Screen Recording Permission
Screen recording permission allows TeamViewer to display your Mac’s screen to a remote user.
To enable it:
- Open System Settings.
- Navigate to Privacy & Security.
- Select Screen & System Audio Recording or the corresponding screen recording permission.
- Locate TeamViewer.
- Enable the required permission.
- Restart TeamViewer if prompted.
The exact setting name may vary depending on your macOS version.
Step 3: Grant Accessibility Permission
Accessibility permission allows TeamViewer to control your Mac remotely using supported input functionality.
Follow these steps:
- Open System Settings.
- Navigate to Privacy & Security.
- Select Accessibility.
- Locate TeamViewer.
- Enable the required permission.
- Confirm the changes if prompted.
Without accessibility permission, remote users may be able to view your screen but may not be able to interact with it properly.
Step 4: Grant Additional Permissions if Required
Depending on the version and functionality you use, TeamViewer may request additional permissions.
These can include:
- Full Disk Access
- System audio access
- Other privacy-related permissions
Grant only the permissions required for the functionality you intend to use.
Step 5: Configure Remote Access
To connect to another computer:
- Open TeamViewer.
- Enter the remote computer’s ID.
- Select Remote Control.
- Click Connect.
- Enter the required authentication information.
- Wait for the remote session to start.
If you want to access your Mac remotely without someone manually accepting the connection, configure unattended access using the supported account and device settings.
How to Connect Windows and Mac Using TeamViewer
One of TeamViewer’s advantages is its cross-platform compatibility.
You can connect between supported Windows and Mac computers without requiring both devices to use the same operating system.
Example: Connect Mac to Windows
- Install TeamViewer on both devices.
- Open TeamViewer on the Windows computer.
- Locate its TeamViewer ID and authentication information.
- Open TeamViewer on your Mac.
- Enter the Windows computer’s ID.
- Select Remote Control.
- Click Connect.
- Enter the required authentication information.
- Start the remote session.
Example: Connect Windows to Mac
- Install and open TeamViewer on your Mac.
- Grant the required macOS permissions.
- Locate your Mac’s connection information.
- Open TeamViewer on the Windows computer.
- Enter the Mac’s TeamViewer ID.
- Select Remote Control.
- Click Connect.
- Authenticate the connection.
- Begin the remote session.
Note: The permissions and remote control capabilities available on Mac may differ from those on Windows.
How to Transfer Files Using TeamViewer
After installation, you can use TeamViewer to transfer files between supported devices.
Steps to Transfer Files
- Open TeamViewer on your computer.
- Enter the remote computer’s ID.
- Select the File Transfer option.
- Click Connect.
- Enter the required authentication information.
- Wait for the file transfer interface to open.
- Select the file you want to transfer.
- Choose the destination folder.
- Start the transfer.
- Verify that the file has been transferred successfully.
File Transfer Between Windows and Mac
TeamViewer supports file transfer between compatible Windows and Mac devices.
However, file permissions, folder locations, and operating system restrictions may differ.
For example, macOS may require additional permissions to access specific folders.
How to Configure TeamViewer to Start Automatically
If you regularly use TeamViewer for remote access, you may want it to start automatically when your computer boots.
On Windows
Depending on the installed version:
- Open TeamViewer.
- Navigate to Settings.
- Locate the General or startup-related settings.
- Enable the option to start TeamViewer with Windows if available.
- Save the changes.
You may also review Windows startup applications through Task Manager or Settings.
On Mac
To configure startup behavior:
- Open System Settings.
- Navigate to General.
- Select Login Items.
- Review the applications permitted to start at login.
- Add TeamViewer if the installed version supports this workflow and you want it to launch automatically.
Important: Automatic startup and unattended access are different features. Starting TeamViewer automatically does not necessarily mean remote connections are authorized without additional configuration.
How to Update TeamViewer on Windows and Mac
Keeping TeamViewer updated helps improve compatibility, security, and stability.
Update TeamViewer on Windows
- Open TeamViewer.
- Navigate to the application menu or settings.
- Locate the update option if available.
- Check for available updates.
- Download and install the latest compatible version.
- Restart the application if required.
Update TeamViewer on Mac
- Open TeamViewer.
- Navigate to its application menu or settings.
- Locate the update option.
- Check for updates.
- Follow the installation instructions.
- Restart TeamViewer if necessary.
You can also visit the official TeamViewer download page to obtain the latest installer.
Common TeamViewer Installation Problems and Solutions
Sometimes TeamViewer may fail to install or function correctly. Below are common problems and troubleshooting steps.
1. TeamViewer Is Not Installing on Windows
Possible causes:
- Insufficient permissions
- Incomplete installer download
- Conflicting software
- Unsupported Windows version
- Insufficient disk space
Solutions:
- Download the installer again from the official website.
- Run the installer with appropriate administrator permissions.
- Check available disk space.
- Restart your computer.
- Verify operating system compatibility.
- Review any error message displayed during installation.
2. TeamViewer Is Not Installing on Mac
Possible causes:
- Incompatible macOS version
- Corrupted installation package
- Insufficient permissions
- Security restrictions
Solutions:
- Download a compatible version.
- Verify that the installation file is complete.
- Follow the official installation instructions.
- Check macOS security settings.
- Restart your Mac.
- Contact TeamViewer support if the problem persists.
3. TeamViewer Is Installed but Cannot Control Mac
This issue is commonly related to missing privacy permissions.
Solutions:
- Open System Settings.
- Navigate to Privacy & Security.
- Check Screen Recording permissions.
- Check Accessibility permissions.
- Enable TeamViewer where required.
- Restart TeamViewer.
- Test the remote connection again.
4. TeamViewer Is Showing a Connection Error
Possible causes:
- Internet connectivity issues
- Remote computer is offline
- Firewall restrictions
- Incorrect authentication information
- Outdated TeamViewer installation
Solutions:
- Check the internet connection.
- Confirm that the remote computer is powered on.
- Verify the TeamViewer ID.
- Confirm authentication details.
- Update TeamViewer.
- Review firewall settings.
5. TeamViewer Is Running Slowly
Possible causes:
- Slow internet
- High system resource usage
- Network congestion
- High remote display resolution
Solutions:
- Use a more stable internet connection.
- Close unnecessary applications.
- Reduce remote display quality.
- Disable unnecessary visual effects.
- Restart the remote session.
TeamViewer Installation Checklist
Before using TeamViewer regularly, review the following checklist.
| Task | Windows | Mac |
| Download official installer | ✓ | ✓ |
| Install TeamViewer | ✓ | ✓ |
| Launch application | ✓ | ✓ |
| Check TeamViewer ID | ✓ | ✓ |
| Create or sign in to account | Optional | Optional |
| Configure remote access | ✓ | ✓ |
| Grant screen permissions | Usually not required in the same way | ✓ |
| Grant accessibility permissions | Usually not required in the same way | ✓ |
| Enable two-factor authentication | Recommended | Recommended |
| Configure unattended access | Optional | Optional |
| Test remote connection | ✓ | ✓ |
| Check for updates | Recommended | Recommended |
Frequently Asked Questions
1. Is TeamViewer available for Windows and Mac?
Yes. TeamViewer provides applications for supported Windows and macOS versions. You can download the appropriate version from its official website.
2. Is TeamViewer free to install?
TeamViewer can be installed for eligible personal use without purchasing a commercial license. Commercial usage generally requires an appropriate paid subscription.
3. Do I need to install TeamViewer on both computers?
For standard remote control connections, TeamViewer generally needs to be available on both devices. Supported alternative connection methods may vary depending on the version and operating system.
4. Why does TeamViewer require permissions on Mac?
macOS uses privacy controls to restrict screen recording and remote input. TeamViewer requires appropriate permissions to display and control the Mac during supported remote sessions.
5. Can I use TeamViewer without creating an account?
Yes. Some remote connection workflows can be used without signing in to a TeamViewer account. However, account-based features such as device management and certain unattended access options may require an account.
6. How do I enable unattended access?
Sign in to TeamViewer, navigate to the supported remote access or device management settings, and follow the instructions to authorize the device and configure secure authentication.
7. Can TeamViewer connect Windows to Mac?
Yes. TeamViewer supports remote connections between compatible Windows and Mac devices.
8. How do I uninstall TeamViewer?
On Windows, use the installed applications section in Windows Settings or Control Panel. On Mac, follow the official TeamViewer uninstall instructions for your installed version, including any additional components if required.
Conclusion
Installing and setting up TeamViewer on Windows and Mac is relatively simple. Once the application is installed, you can configure remote access, connect to other computers, transfer files, and manage supported devices.
Windows users can generally complete installation through a straightforward setup wizard, while Mac users need to pay additional attention to privacy permissions for screen sharing and remote control.
For secure remote access, always use strong authentication, enable two-factor authentication, keep TeamViewer updated, and connect only to trusted devices.
If you are just getting started, install TeamViewer on two computers and test a basic remote connection before configuring unattended access.
Explore more software tutorials, remote access guides, and technology articles on NextBloggers to improve your digital workflow.
Leave a Reply