


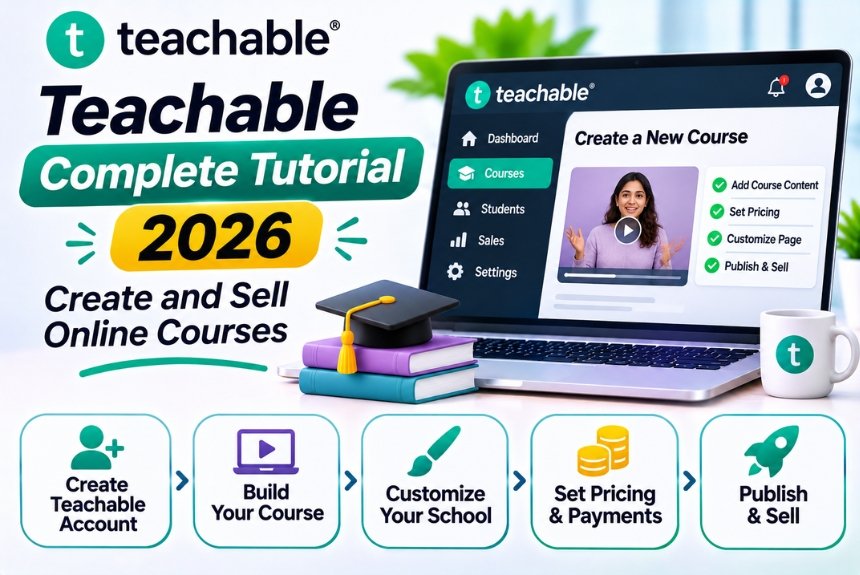
Teachable Complete Tutorial 2026: Create and Sell Online Courses
The online education industry continues to grow as creators, educators, coaches, and businesses look for ways to share knowledge and generate revenue through digital learning. Whether you want to teach digital marketing, programming, photography, fitness, business management, or professional skills, creating an online course can be an effective way to monetize your expertise.
However, launching an online course requires more than recording videos and uploading them to a website. You need a platform that helps you organize lessons, manage students, accept payments, deliver learning materials, and market your educational products.
Teachable is one of the popular platforms designed to simplify this process. It allows creators to build online courses, offer coaching, sell digital downloads, and manage student experiences without developing a learning management system from scratch.
In this comprehensive Teachable tutorial, we’ll explain how to use the platform step by step, create your first online course, configure pricing, customize your school, and start selling your educational products in 2026.
What Is Teachable?
Teachable is a hosted online course creation and selling platform that enables creators to build digital learning businesses.
It provides tools for creating courses, uploading educational content, managing students, accepting payments, and promoting digital products.
Unlike traditional website development, where you need to configure hosting, install plugins, and integrate several services, Teachable offers a centralized environment for managing your online education business.
What Can You Create With Teachable?
You can use Teachable to sell:
- Video-based online courses
- Self-paced learning programs
- Educational workshops
- Professional training courses
- Coaching sessions
- Digital downloads
- Membership-based learning experiences, depending on available features
For example, a digital marketing professional could create courses on SEO, Google Ads, content marketing, social media strategy, and marketing automation.
Similarly, a fitness coach could offer workout programs, nutrition education, and personalized coaching sessions.
Key Features of Teachable
Before learning how to create your first course, let’s understand the major features available on the platform.
| Feature | Description |
| Course Builder | Create structured courses with lessons and learning modules |
| Video Hosting | Upload and deliver video-based educational content |
| Website Builder | Create a branded online school and sales pages |
| Student Management | Manage student enrollment and learning access |
| Assessments | Create quizzes and evaluate student progress |
| Digital Products | Sell downloadable educational resources |
| Coaching | Offer individual or group coaching experiences |
| Payment Processing | Accept payments through supported payment options |
| Marketing Tools | Create promotions, coupons, and sales campaigns |
| Analytics | Monitor sales and business performance |
| Integrations | Connect supported third-party tools |
| AI Capabilities | Access eligible AI-powered creation and productivity features |
Feature availability, limits, and integrations vary depending on your Teachable plan.
Step 1: Create Your Teachable Account
The first step is to create an account and set up your online school.
1. Visit the Teachable Website
Go to the official Teachable website:
Select the option to get started or create an account.
2. Sign Up
Enter the required information, such as:
- Name
- Email address
- Password
You may also have the option to register using a supported third-party account.
Complete the registration process and verify your account if required.
3. Set Up Your School
After signing in, Teachable will guide you through the initial setup process.
You may need to provide information such as:
| Setting | Purpose |
| School Name | Identifies your online learning business |
| Business Type | Helps define your creator or educational business |
| Course Category | Identifies your subject area |
| Business Goals | Helps customize your onboarding experience |
| Website Details | Establishes your online school identity |
Choose a school name that reflects your brand and the educational products you plan to offer.
For example, if you teach marketing and business skills, you could use a brand name such as Digital Growth Academy.
Step 2: Set Up Your Teachable School
Once your account is ready, configure your school before creating and publishing courses.
1. Customize Your School Name
Your school name appears in relevant areas of your online learning experience.
Choose a name that is:
- Easy to remember
- Relevant to your subject
- Professional
- Suitable for future expansion
Avoid using a name that limits you to a single course if you plan to build a larger educational business.
2. Configure Your Branding
Teachable allows you to customize the visual identity of your school within the available design options.
Consider adding:
- Brand logo
- School name
- Brand colors
- Typography
- Homepage content
- Course thumbnails
- Instructor information
A consistent visual identity helps create a professional learning experience and builds trust with prospective students.
3. Configure Your Domain
Teachable provides a school URL, and eligible configurations support connecting a custom domain.
For example:
youracademy.teachable.com
Or you can use a branded domain:
www.youracademy.com
To connect a custom domain:
- Open your school settings.
- Locate the domain configuration section.
- Enter your custom domain.
- Review the DNS instructions provided by Teachable.
- Update the required DNS records with your domain registrar.
- Verify the connection.
- Wait for the domain and SSL configuration to complete.
A custom domain can make your educational business look more professional and help establish a recognizable brand.
Step 3: Create Your First Online Course
Now it’s time to create your first course.
1. Open the Course Builder
From your Teachable dashboard:
- Navigate to the products or courses section.
- Select the option to create a new course.
- Enter your course title.
- Add the required details.
- Continue to the course editor.
Your course title should clearly communicate what students will learn.
For example:
SEO Masterclass: Complete Search Engine Optimization Training
This title communicates both the subject and the educational value of the course.
2. Add Your Course Description
Your course description should explain the learning experience and outcomes.
A good course description includes:
- What the course teaches
- Who should enroll
- Skills students will learn
- Topics covered
- Course format
- Expected learning outcomes
- Why the course is valuable
Example Course Description
SEO Masterclass: Complete Search Engine Optimization Training
Learn how to improve website visibility, conduct keyword research, optimize website content, build backlinks, and measure SEO performance through practical lessons.
This course is designed for beginners, marketing professionals, website owners, and business entrepreneurs who want to develop effective SEO skills.
By the end of the course, students will understand how to build an SEO strategy, optimize website pages, and monitor search performance.
3. Upload Your Course Thumbnail
Your course thumbnail is one of the first things potential students see.
Create a professional thumbnail that includes:
- Course title or shortened headline
- Relevant visual elements
- Instructor or brand identity
- Clear typography
- Consistent colors
Avoid overcrowding the thumbnail with too much text.
4. Organize Your Course Curriculum
Teachable allows you to structure courses using sections and lessons.
A well-organized curriculum makes it easier for students to follow the learning process.
For example:
| Section | Lesson |
| Introduction | Welcome to the Course |
| Introduction | Course Overview |
| SEO Fundamentals | What Is SEO? |
| SEO Fundamentals | How Search Engines Work |
| Keyword Research | Understanding Search Intent |
| Keyword Research | Finding Relevant Keywords |
| On-Page SEO | Optimizing Website Content |
| Technical SEO | Understanding Technical SEO |
| Link Building | Building Quality Backlinks |
| SEO Analytics | Measuring SEO Performance |
| Final Section | Practical Project and Conclusion |
Organize lessons in a logical sequence, starting with foundational concepts and gradually introducing more advanced topics.
Step 4: Add Lessons and Upload Content
Once your curriculum is ready, start adding content to individual lessons.
1. Add Video Lessons
Video is one of the most popular formats for online learning.
To add a video lesson:
- Open the relevant course section.
- Create or select a lesson.
- Upload your video or use a supported video source.
- Add the lesson title.
- Include a description or supporting text.
- Save your changes.
Depending on your account configuration, Teachable provides video hosting and delivery capabilities for course content.
2. Add Supporting Learning Materials
Videos are useful, but supporting resources can improve the learning experience.
You can include relevant materials such as:
- PDF guides
- Worksheets
- Templates
- Downloadable resources
- Presentation slides
- Reading materials
- Reference documents
For example, an SEO course could include a keyword research spreadsheet, website audit checklist, and content optimization template.
3. Create Text-Based Lessons
Not every lesson needs to be a video.
Text-based lessons can be useful for:
- Definitions
- Step-by-step instructions
- Reference materials
- Reading assignments
- Short explanations
- Resource lists
Combining different lesson formats can make your course more accessible and engaging.
4. Add Quizzes and Assessments
Assessments help students evaluate their understanding.
Depending on your plan and available features, Teachable supports quizzes and assessment functionality.
You can create questions about:
- Course concepts
- Practical applications
- Terminology
- Problem-solving
- Lesson comprehension
For example, after teaching keyword research, you could ask students to identify the search intent behind a particular keyword.
5. Configure Lesson Accessibility
Review how students will access your lessons.
Consider:
- Whether lessons are available immediately
- Whether students need to complete earlier lessons
- Whether content is released gradually
- Whether downloadable materials are accessible
- Whether video playback works properly on mobile devices
Some content delivery and course progression options may depend on your plan.
Step 5: Set Your Course Pricing
After building your course, you need to decide how much students will pay.
Teachable supports different pricing models, depending on product type and plan availability.
Common Course Pricing Models
| Pricing Model | Description | Best For |
| Free | Students enroll without payment | Lead generation and introductory education |
| One-Time Payment | Students pay once for access | Self-paced courses |
| Payment Plan | Students pay in installments | Higher-priced courses |
| Subscription | Students pay recurring fees | Ongoing educational content |
| Bundles | Multiple products sold together | Comprehensive learning programs |
1. Set a One-Time Course Price
A one-time payment is suitable for courses that provide a complete educational experience.
For example:
- Beginner SEO Course: $49
- Advanced SEO Training: $199
- Complete Digital Marketing Program: $499
These are illustrative examples, not recommended fixed prices. Your pricing should reflect the value, audience, course depth, and competitive landscape.
2. Offer Payment Plans
Payment plans allow students to pay for a course in installments rather than paying the entire amount upfront.
For example:
| Payment Option | Total Price |
| One-Time Payment | $300 |
| Three Monthly Payments | $110 × 3 |
Payment plans can make higher-priced educational products more accessible.
However, consider how installment payments affect your revenue, payment processing, and access policies.
3. Create Subscription-Based Products
Subscriptions work well for educational businesses that provide continuous learning opportunities.
Examples include:
- Monthly marketing training
- Weekly workshops
- Ongoing coaching
- New educational content
- Professional development communities
Before using subscriptions, make sure your business can consistently deliver enough value to justify recurring payments.
Step 6: Configure Payments and Taxes
Teachable provides payment functionality for collecting course fees and managing transactions.
The available payment options depend on your country, plan, and business eligibility.
1. Configure Teachable Payments
Navigate to the payment settings in your dashboard.
Review the available payment options and complete the required setup.
Depending on your eligibility, Teachable may provide its own payment solution or support integrations with other payment processors.
2. Connect Supported Payment Providers
Depending on your location and configuration, available payment options may include:
- Teachable Payments
- PayPal
- Supported card payment processing
- Other eligible payment methods
Complete any required account verification before accepting real transactions.
3. Review Transaction Fees
Your total selling cost may include:
- Teachable subscription charges
- Platform transaction fees
- Payment processing fees
- Currency conversion fees
- Taxes
- Additional third-party service costs
The applicable fees depend on your selected plan, payment method, and business location.
Always review the official pricing page before launching a paid course.
4. Configure Taxes
Online course taxation can vary depending on the location of your business and customers.
Teachable provides tax-related functionality for eligible configurations, but you should review:
- Applicable sales taxes
- VAT requirements
- GST obligations
- Digital product taxation
- Business registration requirements
- Tax reporting responsibilities
For businesses operating in India, consult a qualified tax professional regarding GST applicability, invoicing, and international sales requirements.
Step 7: Build Your Course Sales Page
Your sales page is where prospective students decide whether to enroll.
A well-designed sales page communicates the value of your course and encourages visitors to take action.
Essential Sales Page Elements
| Element | Purpose |
| Headline | Communicate the main course benefit |
| Introduction | Explain what the course offers |
| Learning Outcomes | Show what students will achieve |
| Curriculum | Outline the lessons and topics |
| Instructor Profile | Establish credibility |
| Testimonials | Provide social proof when available |
| Pricing | Explain the available payment options |
| FAQ | Address common objections |
| CTA | Encourage enrollment |
Example Sales Page Headline
Master SEO From Beginner to Professional
Learn keyword research, on-page optimization, technical SEO, link building, and analytics through practical lessons designed to help you improve website visibility.
Add a Clear Call to Action
Use action-oriented buttons such as:
- Enroll Now
- Start Learning
- Get Course Access
- Join the Program
Avoid using vague CTAs that do not communicate what happens after the user clicks.
Step 8: Customize Your Teachable Website
Teachable provides website-building tools that allow creators to customize the appearance and structure of their online school.
Important Pages to Create
| Page | Purpose |
| Homepage | Introduce your educational brand |
| Courses Page | Display available courses |
| Course Sales Page | Promote individual courses |
| About Page | Explain your background and expertise |
| Contact Page | Provide communication options |
| FAQ Page | Answer common questions |
| Privacy Policy | Explain data practices |
| Terms and Conditions | Establish terms of use |
| Refund Policy | Explain refund conditions |
Website Customization Tips
- Use a consistent brand identity.
- Make navigation simple.
- Display courses clearly.
- Use professional images.
- Ensure mobile responsiveness.
- Highlight learning outcomes.
- Include clear enrollment buttons.
- Avoid unnecessary design elements.
A well-structured website makes it easier for visitors to understand your educational offerings.
Step 9: Market and Sell Your Online Courses
Creating a course is only the beginning. You also need a strategy to attract students.
Teachable provides tools and integrations that support course promotion, but a successful marketing strategy usually requires additional planning.
1. Build an Email List
Email marketing is useful for nurturing potential students.
You can collect email addresses through:
- Free educational resources
- Webinar registrations
- Newsletter subscriptions
- Free mini-courses
- Downloadable templates
- Lead magnets
Use an email marketing platform to nurture subscribers and promote relevant courses.
2. Use Content Marketing
Create educational content related to your course topics.
Examples include:
- Blog articles
- YouTube tutorials
- Social media posts
- LinkedIn content
- Case studies
- Educational newsletters
Content marketing helps establish expertise and attracts people who are already interested in your subject.
3. Offer Free Mini-Courses
A free mini-course can introduce potential students to your teaching style.
For example, if you’re selling an advanced SEO course, you could offer a free introductory course on keyword research.
This allows potential students to experience your content before making a purchase.
4. Use Webinars and Live Workshops
Webinars provide opportunities to demonstrate your expertise and interact with potential students.
You can use them to:
- Teach a useful topic
- Explain a common challenge
- Demonstrate a practical solution
- Introduce your course
- Answer questions
- Offer enrollment incentives
5. Create Discounts and Promotions
Promotional campaigns can encourage students to enroll.
Examples include:
- Early-bird discounts
- Seasonal promotions
- Limited-time offers
- Bundle discounts
- Student discounts
- Referral incentives
Avoid relying exclusively on discounts. Your course should communicate sufficient value to justify its regular price.
Step 10: Manage Students and Monitor Performance
After launching your course, you need to manage student activity and monitor business performance.
Student Management
Teachable provides student management capabilities that help you:
- View enrolled students
- Manage enrollment
- Review student activity
- Monitor learning progress where supported
- Communicate with students
- Manage access to course products
Depending on your plan, additional student engagement and reporting capabilities may be available.
Monitor Important Metrics
| Metric | What It Tells You |
| Total Enrollments | Number of students joining your course |
| Revenue | Total sales generated |
| Conversion Rate | Percentage of visitors who enroll |
| Average Order Value | Average revenue per transaction |
| Refund Rate | Percentage of purchases refunded |
| Course Completion | How many students finish the course |
| Student Engagement | How learners interact with course content |
| Traffic Sources | Where prospective students come from |
Use these insights to identify opportunities for improvement.
For example, if many visitors view your sales page but few enroll, you may need to improve your messaging, pricing, testimonials, or course presentation.
Teachable Pricing 2026
Teachable offers different subscription plans designed for creators at different stages of business development.
Plan names, pricing, transaction fees, and included features may change. Always check the official pricing page before subscribing.
Teachable Pricing Plans
| Plan | Best For | General Capabilities |
| Starter | New creators | Launching an online course business |
| Builder | Growing creators | Additional business and customization features |
| Growth | Established creators | More advanced marketing and operational tools |
| Advanced / Custom Options | Larger businesses | Expanded capabilities and support, where available |
Teachable’s pricing structure can include differences in:
- Number of published products
- Transaction fees
- Payment processing
- Customization options
- Integrations
- Student management
- Marketing features
- Support availability
- Administrative capabilities
Important: Do not compare Teachable plans using subscription price alone. Calculate the total cost based on expected enrollments, revenue, transaction fees, payment processing, and required features.
For the latest plan details, visit the official Teachable website:
Teachable Pros and Cons
Before choosing Teachable, consider its advantages and limitations.
Advantages of Teachable
- Beginner-Friendly Course Creation
Teachable provides a structured course builder that allows creators to organize lessons without developing a custom learning platform.
- Hosted Infrastructure
You don’t need to manage your own servers, hosting environment, or core course delivery infrastructure.
- Multiple Digital Product Types
You can create courses, coaching products, and digital downloads within a centralized platform.
- Integrated Payment Functionality
Teachable provides supported payment solutions that simplify selling educational products.
- Student Management Tools
The platform includes functionality for managing enrollments and student access.
- Website and Sales Page Creation
Creators can build pages to showcase and promote their educational products.
- Suitable for Different Creators
Teachable can support educators, coaches, consultants, entrepreneurs, and professional trainers.
Disadvantages of Teachable
- Limited Customization Compared With Self-Hosted Solutions
Creators may have less control over certain technical and design elements than they would with a fully customized website.
- Platform Costs
Subscription fees and transaction costs can affect profitability, particularly for smaller creators.
- Feature Availability Depends on the Plan
Some advanced features may require upgrading to a higher subscription tier.
- Limited Control Over Platform Infrastructure
Teachable manages the underlying platform, which means creators depend on its available features and policies.
- Marketing May Require External Tools
Businesses that need advanced automation, CRM functionality, or complex email campaigns may require third-party integrations.
Teachable vs Other Online Course Platforms
Teachable competes with several platforms that help creators build and sell online courses.
| Feature | Teachable | Thinkific | Kajabi |
| Course Creation | Yes | Yes | Yes |
| Video Lessons | Yes | Yes | Yes |
| Website Builder | Yes | Yes | Yes |
| Student Management | Yes | Yes | Yes |
| Digital Downloads | Yes | Yes | Yes |
| Coaching | Yes | Available features vary | Yes |
| Marketing Tools | Built-in and integrations | Built-in and integrations | Extensive |
| Email Marketing | Features and integrations | Features and integrations | Strong integrated functionality |
| Community Features | Availability varies | Available features vary | Available features vary |
| Best For | Course creators and educators | Educators and training businesses | All-in-one knowledge businesses |
Teachable vs Thinkific
Thinkific is another platform focused on online course creation and educational experiences.
Both platforms offer course builders, student management, and tools for selling digital learning products.
Thinkific may be attractive to creators who prioritize educational delivery and learning management features.
Teachable is a strong option for creators who want to combine course creation with selling, coaching, and digital products.
Teachable vs Kajabi
Kajabi is positioned as an all-in-one platform for knowledge-based businesses.
It combines online courses with additional marketing and business management functionality.
Kajabi may be suitable for creators who want more integrated marketing automation, funnels, and business tools.
Teachable may appeal to creators who primarily need course delivery, digital product selling, and a relatively straightforward learning platform.
Best Practices for Creating a Successful Teachable Course
1. Identify a Specific Target Audience
Don’t create a course for everyone.
Identify a specific group of learners and understand their challenges, goals, and skill levels.
2. Focus on Learning Outcomes
Your course should solve a real problem or help students achieve a meaningful goal.
Define what learners should be able to do after completing the course.
3. Keep Lessons Organized
Break complex subjects into manageable sections.
Avoid excessively long lessons that make it difficult for students to maintain focus.
4. Prioritize Content Quality
Use clear audio, good video quality, organized presentations, and accurate information.
The quality of your educational content matters more than expensive production equipment.
5. Provide Practical Resources
Include worksheets, templates, checklists, exercises, and other materials that help students apply what they learn.
6. Encourage Student Engagement
Use quizzes, practical assignments, discussions, or coaching sessions where appropriate.
7. Collect Feedback
Ask students about their learning experience.
Use feedback to improve course structure, explanations, and supporting materials.
8. Update Your Course Regularly
Industries change, and educational content can become outdated.
Review your lessons periodically and update information, examples, and resources.
Frequently Asked Questions
1. Is Teachable free to use?
Teachable may offer trial or promotional access, but its full course-selling functionality is generally available through paid plans. Check the official pricing page for current offers and subscription details.
2. Can I create an online course without coding?
Yes. Teachable provides a course builder and website customization tools that allow you to create and sell courses without writing code.
3. Can I sell multiple courses on Teachable?
Yes. Teachable supports multiple educational products, although the number of published products and available features may depend on your subscription plan.
4. Does Teachable support video hosting?
Yes. Teachable provides video delivery functionality for online course lessons, subject to applicable plan limits and platform requirements.
5. Can I sell digital downloads using Teachable?
Yes. Teachable supports digital downloads, allowing creators to sell educational resources such as ebooks, templates, guides, and worksheets.
6. Can I offer payment plans for my courses?
Teachable supports different pricing models, including installment-based payment options for eligible products and plans. Availability depends on your configuration.
7. Does Teachable provide certificates of completion?
Certificate functionality is available in supported configurations. Check your current plan and course settings to confirm availability and customization options.
8. Can I connect my own domain to Teachable?
Yes. Eligible configurations support connecting a custom domain to your online school. You need to configure the required DNS records and verify the connection.
9. Is Teachable suitable for businesses and corporate training?
Teachable can be used to deliver professional training and educational content. However, businesses requiring advanced enterprise LMS functionality, employee reporting, or complex learning management workflows should evaluate the platform carefully.
10. Can I integrate email marketing tools with Teachable?
Yes. Teachable supports integrations and automation workflows with compatible third-party services. Available integrations and functionality depend on your plan and the tools you choose.
Conclusion
Teachable is a practical platform for creators who want to transform their knowledge into online courses, coaching programs, and digital products.
Its course builder, hosted infrastructure, payment functionality, student management, and website creation tools simplify many of the technical challenges involved in launching an online education business.
However, before choosing Teachable, consider your budget, course requirements, marketing strategy, customization needs, and expected revenue.
If your primary goal is to create and sell educational content without building a custom learning platform, Teachable is worth exploring.
Ready to create your first online course? Start with Teachable and explore its course-building tools, then develop a structured curriculum that delivers meaningful value to your students.
Leave a Reply