


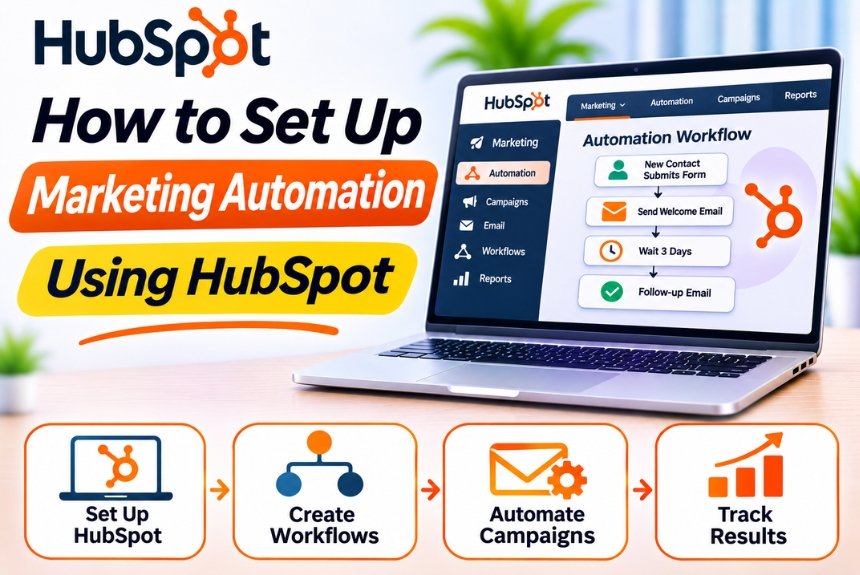
How to Set Up Marketing Automation Using HubSpot
Marketing automation has become an essential part of modern digital marketing. Businesses need to generate leads, nurture prospects, send personalized messages, manage campaigns, and convert potential customers without manually performing every task.
However, managing these activities manually becomes increasingly difficult as your contact database grows. Marketing teams often struggle with repetitive tasks, inconsistent follow-ups, disconnected tools, and inefficient lead management.
This is where HubSpot Marketing Automation can make a difference.
HubSpot provides marketing automation tools that help businesses automate repetitive marketing activities, organize customer data, personalize communication, and create workflows that guide prospects through the customer journey.
Whether you are a beginner setting up your first automation or a marketing professional looking to optimize existing campaigns, HubSpot offers tools to streamline your marketing processes.
In this comprehensive guide, we will explain how to set up marketing automation using HubSpot, from account configuration and contact segmentation to workflow creation, lead nurturing, email automation, reporting, and advanced optimization.
What Is Marketing Automation in HubSpot?
Marketing automation in HubSpot refers to using automated workflows, customer data, and marketing tools to execute repetitive marketing tasks based on predefined conditions.
Instead of manually sending emails, assigning leads, updating contact properties, or managing follow-ups, businesses can create automated processes that perform these actions when specific triggers occur.
For example, when a visitor downloads an ebook from your website, HubSpot can automatically:
- Create or update the visitor’s contact record.
- Assign the appropriate lifecycle stage.
- Add the contact to a relevant list.
- Send a confirmation email.
- Enroll the contact in a lead-nurturing sequence, if eligible.
- Notify the sales team when the contact meets qualification criteria.
This creates a more organized and consistent marketing process.
Why Use HubSpot for Marketing Automation?
HubSpot combines CRM data with marketing tools, allowing businesses to automate activities using information about their contacts, companies, deals, and interactions.
Key Benefits of HubSpot Marketing Automation
| Benefit | How It Helps |
| Automated Lead Nurturing | Builds relationships with prospects through timely communication |
| Contact Segmentation | Groups contacts according to behavior and characteristics |
| Workflow Automation | Reduces repetitive marketing tasks |
| Personalized Communication | Uses CRM data to make messages more relevant |
| Lead Qualification | Helps identify prospects ready for sales engagement |
| Campaign Management | Organizes marketing activities in one platform |
| Performance Tracking | Measures campaign and automation performance |
| Sales and Marketing Alignment | Improves coordination between teams |
HubSpot’s automation capabilities vary depending on the product and subscription plan. Some features, including advanced workflows and certain marketing automation functions, may require paid subscriptions.
Official Website: https://www.hubspot.com/
Step 1: Create and Configure Your HubSpot Account
Before building marketing automation workflows, you need to configure your HubSpot account properly.
Create a HubSpot Account
- Visit the official HubSpot website.
- Sign up using your email address or an available authentication method.
- Enter your business information.
- Complete the account verification process.
- Follow the initial setup instructions.
- Access your HubSpot dashboard.
HubSpot offers free CRM functionality, while advanced marketing automation features are available through eligible paid products.
Configure Your Marketing Settings
After creating your account, review the following settings.
Company Information
Add your business name, website, address, and other relevant details.
Email Domain
Connect and authenticate your sending domain when required for marketing email delivery.
Domain authentication helps establish trust with email providers and supports email deliverability.
User Permissions
Assign appropriate access to marketing team members.
Time Zone
Set the correct time zone to ensure that scheduled campaigns and workflow delays operate according to your business requirements.
Privacy and Consent
Configure subscription types, communication preferences, and consent-related settings according to applicable privacy regulations.
This is particularly important if you collect leads from multiple countries.
Step 2: Understand HubSpot Marketing Automation Tools
Before creating workflows, it is important to understand the main tools available within HubSpot.
| Tool | Purpose |
| Workflows | Automate marketing and CRM processes |
| Marketing Emails | Send automated and campaign-based emails |
| Forms | Collect information from website visitors |
| Lists | Segment contacts based on properties and behavior |
| Landing Pages | Capture leads through targeted campaigns |
| CRM Properties | Store customer and prospect information |
| Marketing Campaigns | Organize and measure campaign activities |
| Lead Scoring | Evaluate prospects based on selected criteria |
| Reporting Dashboards | Monitor marketing performance |
| Integrations | Connect HubSpot with external platforms |
These tools work together to create a connected marketing automation system.
Step 3: Organize Your Contact Database
Marketing automation depends on accurate and organized contact information.
If your CRM contains incomplete, outdated, or duplicated records, automated campaigns may not work as expected.
Import Existing Contacts
If you already have contacts in Excel, Google Sheets, or another CRM, you can import them into HubSpot.
How to Import Contacts
- Navigate to the Contacts section.
- Select the import option.
- Choose the option to import a file.
- Upload your CSV or supported spreadsheet.
- Map the spreadsheet columns to HubSpot properties.
- Review the data and import settings.
- Complete the import.
Example Contact Database
| First Name | Last Name | Company | Lead Source | |
| Rahul | Sharma | rahul@example.com | ABC Technologies | Website |
| Priya | Verma | priya@example.com | XYZ Solutions | |
| Aman | Gupta | aman@example.com | Digital Growth | Webinar |
Ensure that contacts have appropriate communication permissions before enrolling them in marketing email automation.
Create Custom Contact Properties
Contact properties help you collect and organize information relevant to your marketing activities.
For example, a B2B company might create the following properties:
| Property | Purpose |
| Industry | Identify the contact’s business sector |
| Company Size | Segment businesses by size |
| Marketing Interest | Track interested services or products |
| Lead Source | Identify where the lead originated |
| Purchase Timeline | Understand potential buying timelines |
| Marketing Qualified | Identify qualified marketing leads |
| Preferred Content | Track relevant content categories |
Custom properties allow your automation to use more meaningful information than just names and email addresses.
Step 4: Create Contact Segmentation Using Lists
Contact segmentation is one of the most important steps in marketing automation.
Instead of sending the same message to every contact, you can organize your audience into relevant groups.
HubSpot provides list-based segmentation using contact properties and other available criteria.
Static Lists vs. Active Lists
| Feature | Static List | Active List |
| Membership | Manually maintained | Automatically updated |
| Criteria | Does not continuously evaluate conditions | Continuously evaluates defined conditions |
| Best Use | One-time campaigns | Ongoing marketing automation |
| Updating | Manual changes | Automatic inclusion and removal |
How to Create an Active List
- Navigate to Contacts.
- Open Lists.
- Create a new list.
- Select the appropriate list type.
- Add segmentation criteria.
- Review the contacts matching your criteria.
- Save the list.
Example: Segment Contacts by Industry
Suppose you want to target contacts working in the healthcare industry.
Your list criteria might include:
Industry: Healthcare
You can then use this list to organize relevant campaigns and educational content.
Example: Segment Contacts by Engagement
You might create a list of contacts who have engaged with selected marketing activities.
Depending on the available tracking and subscription features, criteria could include:
- Submitted a particular form
- Visited a specific website page
- Clicked a marketing email
- Downloaded a resource
- Registered for a webinar
Behavior-based segmentation can help you deliver more relevant content.
Step 5: Create Marketing Emails
Marketing emails are an important component of HubSpot automation.
Businesses can use email automation to deliver educational content, follow-up messages, product information, and promotional campaigns.
How to Create a Marketing Email
- Navigate to Marketing.
- Open the email tool.
- Create a new marketing email.
- Select the appropriate email type.
- Choose a template.
- Add your subject line and preview text.
- Design the email content.
- Configure personalization where appropriate.
- Review the recipients and subscription settings.
- Test the email.
- Save it for use in your automation workflow.
Types of Marketing Emails
| Email Type | Purpose |
| Welcome Email | Introduce your business to new subscribers |
| Educational Email | Share useful information |
| Lead Nurturing Email | Build relationships with prospects |
| Product Email | Explain product features and benefits |
| Promotional Email | Communicate offers and promotions |
| Webinar Email | Promote or follow up on events |
| Re-engagement Email | Encourage inactive contacts to reconnect |
Marketing email availability, sending limits, and automation features depend on your HubSpot subscription.
Step 6: Create Your First Marketing Automation Workflow
Now let’s create a basic marketing automation workflow in HubSpot.
For this example, we will build a Welcome Email Automation that sends an email when a new contact subscribes to your newsletter.
Understanding Workflow Triggers
A workflow begins when a contact meets a specified enrollment condition.
Common enrollment triggers may include:
- Contact is created
- Contact submits a form
- Contact joins a list
- Contact meets specific property conditions
- Contact performs a supported marketing interaction
Available triggers depend on the workflow type and subscription.
How to Create a Workflow
- Navigate to Automation.
- Open Workflows.
- Click Create Workflow.
- Choose the appropriate workflow type.
- Select a contact-based workflow if you are automating contact marketing.
- Configure the enrollment trigger.
- Add the required workflow actions.
- Review re-enrollment settings.
- Test the workflow.
- Activate it.
Example: Welcome Email Workflow
Enrollment Trigger
Contact submits the newsletter subscription form.
Workflow Action 1
Send a welcome email.
Workflow Action 2
Wait for a defined period, such as two days.
Workflow Action 3
Send an educational email introducing your business or sharing a helpful resource.
Workflow Action 4
Wait for another defined period.
Workflow Action 5
Send an email highlighting relevant content or services.
Workflow Action 6
Review engagement or qualification conditions and route the contact to an appropriate next step.
This workflow creates a consistent experience for new subscribers without requiring manual intervention for each contact.
Important: Before activating a workflow, confirm that the enrollment criteria, email permissions, re-enrollment settings, and suppression rules are configured correctly.
Step 7: Set Up Lead Nurturing Automation
Lead nurturing is the process of building relationships with potential customers through relevant and timely communication.
Many prospects are not ready to purchase immediately. They may need additional information, education, or reassurance before making a decision.
HubSpot allows businesses to create automated nurturing workflows that deliver content based on lead characteristics and behavior.
Example: B2B Lead Nurturing Workflow
Suppose a visitor downloads a guide about digital marketing services.
You want to nurture the contact before assigning them to the sales team.
Workflow Structure
| Timing | Action | Purpose |
| Immediately | Send resource confirmation | Deliver requested content |
| Day 2 | Send educational email | Build trust |
| Day 5 | Share a relevant case study | Demonstrate expertise |
| Day 8 | Share service information | Explain possible solutions |
| Day 12 | Invite contact to a consultation | Encourage conversion |
This is an illustrative sequence. The timing and content should be customized according to your audience and sales cycle.
How to Build the Workflow
- Create a contact-based workflow.
- Set the enrollment trigger to the relevant form submission or list membership.
- Add an email action.
- Add a delay.
- Add another email action.
- Continue with relevant educational content.
- Add conditional branches if supported by your subscription.
- Configure exit or suppression criteria.
- Test the workflow.
- Activate it.
Why Lead Nurturing Works
Lead nurturing helps businesses:
- Maintain consistent communication
- Educate prospects
- Build brand trust
- Improve lead engagement
- Identify purchase intent
- Support sales qualification
- Reduce manual follow-up
The goal is not to send more emails. It is to deliver useful information at the right time.
Step 8: Automate Lead Assignment
Marketing automation can also improve coordination between marketing and sales teams.
When a contact becomes qualified, HubSpot can help assign the lead to the appropriate sales representative and initiate follow-up activities.
Example: Automatic Lead Assignment
Suppose your business receives leads from multiple sources.
You want to assign new leads to sales representatives automatically.
Workflow Configuration
Enrollment Trigger: A contact meets your defined lead qualification conditions.
Action 1: Assign the contact owner.
Action 2: Update the lead status.
Action 3: Create a follow-up task.
Action 4: Notify the assigned sales representative.
Action 5: Update relevant CRM properties.
Depending on your subscription, you may be able to use additional conditions and branching logic to assign leads based on territory, company size, industry, or other attributes.
Example: Assign Leads by Region
A business may divide its sales team by geographic territory.
| Region | Assigned Team |
| North | North Sales Team |
| South | South Sales Team |
| East | East Sales Team |
| West | West Sales Team |
A workflow can use the contact’s region property to determine the appropriate assignment, subject to available automation features.
This helps businesses manage incoming leads more efficiently.
Step 9: Create Automated Follow-Up Campaigns
Following up with prospects is essential, but manually tracking every follow-up can be difficult.
HubSpot can automate selected follow-up activities using workflow actions and CRM properties.
Example: Follow-Up After a Demo Request
Suppose a prospect submits a form requesting a product demonstration.
You can create a workflow that:
- Enrolls the contact after the demo request form is submitted.
- Assigns the contact to a sales representative.
- Creates a follow-up task.
- Sends an appropriate confirmation email.
- Waits for a defined period.
- Checks whether the contact has progressed to a relevant stage.
- Creates another task or notification if follow-up is still required.
This helps your sales team avoid missing important opportunities.
Automate Follow-Up Based on Deal Stages
You can also use deal-based automation to create tasks when a deal reaches a specific stage.
For example:
Trigger: Deal enters the Proposal Sent stage.
Action: Create a task for the deal owner to follow up.
Delay: Wait for a defined period.
Condition: Check whether the deal has moved to another stage.
Action: Notify the owner if the deal still requires attention.
The exact workflow capabilities depend on the subscription and selected automation tools.
Step 10: Set Up Lead Scoring
Lead scoring helps businesses prioritize prospects according to their characteristics and engagement.
Rather than treating every contact equally, you can assign scores based on relevant actions and attributes.
What Is Lead Scoring?
Lead scoring is a method of evaluating prospects using predefined criteria.
A business might assign points based on:
- Job title
- Company size
- Industry
- Website engagement
- Form submissions
- Email interactions
- Content downloads
- Demo requests
- Product interest
Example Lead Scoring Model
| Activity or Attribute | Illustrative Score |
| Visits pricing page | +10 |
| Downloads an ebook | +5 |
| Requests a demo | +25 |
| Attends a webinar | +10 |
| Matches target industry | +10 |
| Matches target company size | +10 |
| Unsubscribes from marketing emails | Apply appropriate suppression or negative qualification logic |
These scores are examples only. Businesses should develop scoring models based on their actual conversion data.
How to Use Lead Scores
A business might establish the following qualification framework:
| Score | Classification | Suggested Action |
| 0–20 | Low engagement | Continue educational nurturing |
| 21–50 | Moderate engagement | Send relevant content |
| 51–75 | High engagement | Review for qualification |
| 76+ | Strong engagement | Consider sales follow-up |
Actual score thresholds should be tested and refined.
HubSpot’s lead scoring functionality and available scoring criteria depend on your subscription.
Step 11: Automate Customer Onboarding
Marketing automation should not stop when a prospect becomes a customer.
Customer onboarding is an important opportunity to create a positive experience, improve retention, and encourage long-term engagement.
Example: Customer Onboarding Workflow
Suppose a deal is marked Closed Won.
Your automation can initiate a structured onboarding process.
Workflow Actions
- Enroll the relevant contact or deal when the sale is completed.
- Send a welcome email.
- Notify the account management or delivery team.
- Create an onboarding task.
- Share relevant documentation.
- Schedule an onboarding meeting where appropriate.
- Track onboarding progress using CRM properties.
- Send appropriate follow-up communication.
This workflow can help ensure that new customers receive consistent communication after purchasing.
Why Customer Onboarding Automation Matters
- Improves communication consistency
- Reduces manual coordination
- Helps customers understand next steps
- Supports internal team collaboration
- Creates a structured customer experience
- Helps identify onboarding issues
Step 12: Use Personalization in Marketing Automation
Personalization allows businesses to create more relevant communication using CRM information.
HubSpot supports personalization through contact properties and other available data.
Examples of Personalization
Instead of sending:
“Hello, valued customer.”
You might use:
“Hi {{ contact.firstname }},”
Depending on the email editor and personalization token format available in your account.
Personalization Opportunities
| Data | Possible Personalization |
| First Name | Personalized greeting |
| Company Name | Company-specific communication |
| Industry | Industry-relevant content |
| Job Title | Role-specific messaging |
| Lead Source | Source-specific follow-up |
| Product Interest | Relevant product information |
| Lifecycle Stage | Appropriate customer journey messaging |
Best Practices for Personalization
- Use accurate contact data.
- Avoid over-personalizing messages.
- Test personalization tokens before sending.
- Configure fallback values where supported.
- Respect contact communication preferences.
- Avoid collecting unnecessary personal information.
Personalization should improve relevance rather than make communication feel intrusive.
Step 13: Create Conditional Workflows
Conditional workflows allow automation to respond differently depending on contact characteristics or behavior.
Instead of sending every contact through the same sequence, businesses can create separate paths based on specific conditions.
Example: Branching Lead Nurturing Workflow
Suppose a contact downloads an ebook.
You want to send different emails based on their industry.
Workflow Structure
Trigger: Contact downloads an ebook.
Action: Send the initial resource email.
Delay: Wait three days.
Branch: Check the contact’s industry.
- Healthcare: Send healthcare-specific content.
- Technology: Send technology-specific content.
- Finance: Send finance-specific content.
- Other or unknown: Send general educational content.
Next Action: Evaluate whether the contact meets your qualification criteria.
Final Action: Continue nurturing or create a sales follow-up task as appropriate.
This creates a more personalized customer journey.
Advanced branching and workflow functionality may require a Professional or Enterprise subscription, depending on the HubSpot product.
Step 14: Automate Marketing Campaigns
HubSpot campaigns help businesses organize multiple marketing activities under a common objective.
For example, a campaign promoting a webinar may include emails, landing pages, forms, social media content, and advertising.
How to Organize a Campaign
- Navigate to Marketing.
- Open Campaigns.
- Create a new campaign.
- Enter the campaign name.
- Define its objective.
- Add relevant marketing assets.
- Associate emails, forms, landing pages, and other available assets.
- Configure tracking where appropriate.
- Monitor campaign performance.
Example: Webinar Marketing Campaign
A webinar campaign might include:
| Activity | Automation |
| Registration | Form captures contact information |
| Confirmation | Automated confirmation email |
| Reminder | Scheduled reminder email |
| Attendance | Contact information updated based on available event integration |
| Follow-Up | Send relevant content after the event |
| Sales Qualification | Notify sales when criteria are met |
This helps businesses manage the campaign lifecycle more consistently.
Step 15: Monitor Marketing Automation Performance
Creating automation is only the beginning.
Businesses must regularly monitor performance to understand whether their workflows are producing meaningful results.
HubSpot offers reporting capabilities that help evaluate marketing and CRM activities.
Important Marketing Automation Metrics
| Metric | What It Measures |
| Email Delivery Rate | Percentage of emails successfully delivered |
| Open Rate | Recorded email opens, subject to tracking limitations |
| Click-Through Rate | Percentage of recipients clicking links |
| Conversion Rate | Percentage completing the desired action |
| Form Submission Rate | Percentage of visitors submitting forms |
| Lead-to-Customer Conversion | Percentage of leads becoming customers |
| Workflow Enrollment | Number of contacts entering a workflow |
| Workflow Completion | Number of contacts completing the workflow |
| Unsubscribe Rate | Percentage unsubscribing from marketing emails |
| Sales Qualified Leads | Number of leads meeting sales qualification criteria |
How to Create a Marketing Dashboard
- Navigate to Reporting.
- Open Dashboards.
- Create a new dashboard.
- Select relevant marketing reports.
- Add workflow and campaign metrics where available.
- Configure reporting filters.
- Save the dashboard.
- Share it with relevant team members.
How to Improve Automation Performance
Review your workflows regularly.
For example, if a nurturing sequence has high email engagement but low consultation bookings, the content may be interesting but not sufficiently aligned with the next conversion step.
If contacts frequently unsubscribe, review the email frequency, audience segmentation, and content relevance.
Use performance data to make informed adjustments rather than relying on assumptions.
Step 16: HubSpot Marketing Automation Best Practices
Successful marketing automation requires planning, testing, and ongoing optimization.
1. Start With a Clear Objective
Do not automate every marketing activity immediately.
Start with a specific goal, such as:
- Increasing lead conversion
- Improving email follow-up
- Reducing manual lead assignment
- Increasing webinar registrations
- Improving customer onboarding
2. Map Your Customer Journey
Understand the steps your prospects take before becoming customers.
Create automation that supports each stage instead of sending unrelated messages.
3. Segment Your Audience
Use relevant contact properties, interests, and engagement information to create appropriate audience groups.
4. Keep Workflows Simple
Avoid creating overly complicated workflows with unnecessary conditions and actions.
Simple workflows are easier to manage, test, and troubleshoot.
5. Use Permission-Based Marketing
Only send marketing emails to contacts who meet the applicable consent and subscription requirements.
Follow relevant privacy and marketing regulations.
6. Test Before Activating
Review workflow triggers, email content, delays, branches, and suppression conditions.
Test with internal contacts or suitable test records whenever possible.
7. Maintain Data Quality
Ensure that contact properties used in workflows are accurate and consistently populated.
8. Monitor Performance
Review automation metrics regularly and optimize workflows based on meaningful business outcomes.
9. Align Marketing and Sales
Establish clear definitions for marketing-qualified and sales-qualified leads.
Ensure that automated lead assignment and sales notifications follow agreed processes.
10. Review Automations Periodically
Update workflows when your products, campaigns, customer journey, or business requirements change.
Step 17: Common HubSpot Marketing Automation Mistakes
Even well-designed automation can become ineffective when businesses overlook important details.
Mistake 1: Sending Too Many Emails
Excessive communication can overwhelm contacts and increase unsubscribes.
Solution: Establish appropriate frequency limits and review engagement.
Mistake 2: Poor Audience Segmentation
Sending the same content to unrelated audiences reduces relevance.
Solution: Create segments based on meaningful characteristics and interests.
Mistake 3: Incorrect Enrollment Triggers
A workflow may enroll the wrong contacts or repeatedly enroll the same contact.
Solution: Review enrollment and re-enrollment settings carefully.
Mistake 4: Ignoring Suppression Criteria
Contacts who have already converted may continue receiving prospect-focused emails.
Solution: Configure appropriate exit conditions and suppression lists.
Mistake 5: Using Inaccurate CRM Data
Incorrect properties can result in irrelevant personalization or lead assignment.
Solution: Maintain accurate data and review property quality.
Mistake 6: Automating Without Testing
Poorly tested workflows may send incorrect emails or update records unexpectedly.
Solution: Test workflow behavior before activation and monitor it after launch.
Mistake 7: Focusing Only on Email Opens
Email opens are affected by privacy protections and tracking limitations.
Solution: Evaluate clicks, conversions, qualified leads, and revenue-related outcomes alongside email metrics.
Step 18: HubSpot Marketing Automation Pricing and Limitations
HubSpot offers different levels of marketing functionality depending on the subscription.
Businesses should carefully review pricing and limitations before designing their automation strategy.
Free CRM
The free CRM provides core customer management features and may include limited marketing tools.
However, advanced marketing automation workflows and some campaign capabilities are not available in the same way as paid Marketing Hub subscriptions.
Starter
Starter plans are designed for businesses that need additional marketing capabilities and fewer limitations than the free offering.
Available automation features may still be more limited than Professional or Enterprise subscriptions.
Professional
Professional plans are generally intended for businesses that need more advanced marketing automation, workflows, campaign management, and reporting.
Enterprise
Enterprise plans provide additional advanced capabilities for larger organizations with more complex marketing operations and requirements.
Before Choosing a Plan, Evaluate:
- Number of marketing contacts
- Email sending requirements
- Workflow automation needs
- Lead scoring capabilities
- Reporting requirements
- Data segmentation requirements
- Integration requirements
- Team size
- Subscription and onboarding costs
Check the latest official pricing: https://www.hubspot.com/pricing
Frequently Asked Questions About HubSpot Marketing Automation
1. What is HubSpot marketing automation?
HubSpot marketing automation uses workflows, CRM data, and marketing tools to automate activities such as lead nurturing, email campaigns, lead assignment, contact segmentation, and customer follow-up.
2. Is HubSpot marketing automation free?
HubSpot offers free CRM tools, but advanced marketing automation capabilities generally require a paid Marketing Hub subscription. Available features depend on the plan.
3. Can I automate emails using HubSpot?
Yes. HubSpot supports automated marketing emails through eligible workflows and marketing tools. Email automation functionality and limits depend on your subscription.
4. What is a workflow in HubSpot?
A workflow is an automated process that performs actions when specified enrollment conditions are met. Actions may include sending emails, updating properties, assigning contacts, creating tasks, and sending notifications.
5. Can HubSpot automate lead generation?
HubSpot can support lead generation automation through forms, landing pages, contact creation, segmentation, workflows, and lead nurturing.
6. Does HubSpot support lead scoring?
Yes. HubSpot offers lead scoring capabilities, but available scoring tools and criteria depend on your subscription and configuration.
7. Can I create automated follow-up emails?
Yes. Eligible workflows can send automated follow-up emails based on contact behavior, form submissions, list membership, or other supported enrollment conditions.
8. What is the difference between marketing automation and CRM?
CRM focuses on managing customer relationships, contact information, sales opportunities, and interactions. Marketing automation focuses on automating marketing activities such as lead nurturing, email campaigns, segmentation, and campaign workflows. HubSpot combines both capabilities within its customer platform.
9. How long does it take to set up HubSpot marketing automation?
Basic automation can be configured relatively quickly. More advanced implementations involving data migration, segmentation, multiple workflows, integrations, and testing may require additional planning and time.
10. Is HubSpot suitable for small businesses?
Yes. Small businesses can use HubSpot to organize contacts, manage leads, and automate selected marketing activities. However, they should evaluate subscription costs and available features before choosing a paid plan.
11. Can HubSpot integrate with WordPress?
Yes. HubSpot offers WordPress integration options that can support lead capture, forms, and other marketing activities. Specific functionality depends on the integration and configuration.
12. Can I automate customer onboarding using HubSpot?
Yes. Businesses can use eligible workflows to trigger welcome emails, create onboarding tasks, notify internal teams, and manage selected customer onboarding activities.
13. Does HubSpot support personalized marketing emails?
Yes. HubSpot supports personalization using CRM properties and other available data. Businesses should ensure their contact information is accurate and test personalization before sending emails.
14. What are the main benefits of marketing automation?
Marketing automation helps businesses improve efficiency, maintain consistent communication, nurture leads, personalize campaigns, reduce manual work, and measure marketing performance.
15. Which businesses should use HubSpot marketing automation?
HubSpot marketing automation is suitable for startups, agencies, B2B companies, SaaS businesses, ecommerce brands, and growing organizations that need structured lead management and automated marketing processes.
Conclusion
HubSpot marketing automation provides businesses with a structured way to manage leads, nurture prospects, personalize communication, and automate repetitive marketing tasks.
By combining CRM data, contact segmentation, workflows, marketing emails, and reporting, businesses can create more consistent customer journeys and improve coordination between marketing and sales teams.
The best approach is to start with a clear objective, organize your contact database, create simple workflows, and gradually introduce advanced automation as your requirements grow.
With proper planning, testing, and optimization, HubSpot can become an important part of your marketing technology stack.
Ready to automate your marketing? Explore HubSpot’s marketing tools, identify repetitive activities in your current workflow, and start building your first automation.
Leave a Reply