


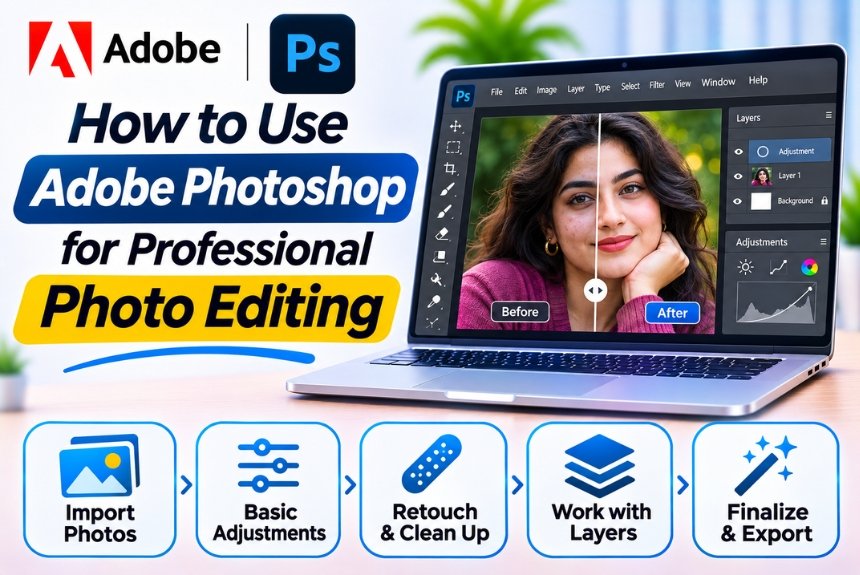
How to Use Adobe Photoshop for Professional Photo Editing
Professional photo editing is more than just applying filters or adjusting brightness. It involves improving image quality, correcting imperfections, enhancing colors, maintaining natural details, and creating visually compelling photographs that communicate a specific message.
Adobe Photoshop is one of the most widely used photo editing applications among photographers, graphic designers, digital marketers, content creators, and creative professionals. Its extensive editing tools, layer-based workflow, advanced selection features, and AI-powered capabilities make it suitable for everything from basic image enhancement to complex photo manipulation.
Whether you want to edit product photography, enhance portraits, create social media visuals, or prepare images for commercial campaigns, learning how to use Adobe Photoshop can significantly improve your creative workflow.
In this guide, we will explore how to use Adobe Photoshop for professional photo editing, covering essential tools, step-by-step editing techniques, advanced features, common mistakes, and practical tips for achieving better results.
What Is Adobe Photoshop?
Adobe Photoshop is a professional image editing and digital design software developed by Adobe. It allows users to edit photographs, manipulate images, create graphics, remove unwanted objects, adjust colors, and produce high-quality visual content.
Unlike basic photo editing applications, Photoshop provides extensive control over individual image elements. Users can work with multiple layers, masks, adjustment settings, selections, filters, and other tools without permanently changing the original image.
Photoshop is widely used for:
- Professional portrait and fashion photography
- Product photography and eCommerce images
- Landscape and travel photography
- Commercial advertising and marketing campaigns
- Photo restoration and enhancement
- Creative photo manipulation
- Social media and website graphics
- Digital artwork and compositing
For beginners, understanding Photoshop’s interface and essential tools is the first step toward developing a professional editing workflow.
Understanding the Adobe Photoshop Interface
Before editing photographs, familiarize yourself with the main components of the Photoshop workspace.
| Interface Component | Purpose |
| Toolbar | Contains selection, cropping, retouching, painting, and other editing tools |
| Options Bar | Displays settings for the currently selected tool |
| Layers Panel | Organizes images, adjustments, text, and effects into separate layers |
| Properties Panel | Provides controls for selected layers, masks, and adjustments |
| Adjustments Panel | Allows non-destructive color and tonal corrections |
| Menu Bar | Provides access to editing commands, filters, image settings, and advanced features |
| Canvas | The main working area where your photograph is displayed |
| History Panel | Helps you review and return to previous editing states |
Tip: Keep your Layers, Properties, and Adjustments panels accessible. These panels are particularly important when working with complex photographs or making multiple revisions.
Step 1: Import Your Photograph into Photoshop
The first step in professional photo editing is importing your original image.
How to Open an Image
- Launch Adobe Photoshop on your computer.
- Navigate to File > Open.
- Select the photograph you want to edit.
- Click Open to load the image onto the canvas.
You can also drag an image directly into Photoshop or use the appropriate opening options available in your version.
Choose the Right Image Format
Different image formats are suitable for different editing requirements.
| Format | Best Use |
| RAW | Professional photography and maximum editing flexibility |
| JPEG | Everyday photography and web-ready images |
| PNG | Graphics requiring transparency |
| TIFF | High-quality professional workflows and print production |
| PSD | Photoshop projects containing editable layers |
| PSB | Large Photoshop documents exceeding standard PSD limits |
If you are editing professional photographs captured with a DSLR or mirrorless camera, RAW files are generally preferable because they preserve more image information for tonal and color adjustments.
Create a Non-Destructive Workflow
Before making any changes, protect your original photograph.
A simple approach is:
- Open the image.
- Duplicate the original layer using Ctrl + J on Windows or Cmd + J on Mac.
- Rename the duplicate layer to something descriptive, such as “Base Photo.”
- Perform edits on the duplicated layer or use adjustment layers.
This allows you to compare your edited photograph with the original and recover from unwanted changes.
Step 2: Crop and Straighten Your Photograph
Composition plays a significant role in professional photography. Even a high-quality photograph can appear unbalanced if the subject is positioned incorrectly or the horizon is tilted.
Photoshop’s Crop Tool helps you improve framing and remove unnecessary areas.
How to Use the Crop Tool
- Select the Crop Tool (C) from the toolbar.
- Adjust the crop boundaries around your subject.
- Choose a suitable aspect ratio if required.
- Straighten the image using the crop tool’s straightening controls.
- Press Enter to apply the crop.
Popular Aspect Ratios for Photography
| Aspect Ratio | Common Application |
| 1:1 | Instagram posts and square product images |
| 4:5 | Portrait-oriented social media content |
| 3:2 | Traditional DSLR photography |
| 16:9 | Website banners, video thumbnails, and presentations |
| 9:16 | Instagram Stories, Reels, and vertical videos |
When cropping, maintain sufficient space around your subject. Avoid cutting off important details, such as hands, hair, product edges, or architectural features.
Step 3: Adjust Brightness, Exposure, and Contrast
Lighting corrections are among the most important aspects of professional photo editing.
A photograph may appear too dark, overexposed, flat, or lacking detail. Photoshop provides several tools for correcting these issues.
Use the Levels Adjustment
The Levels adjustment helps control shadows, midtones, and highlights.
To use it:
- Go to Layer > New Adjustment Layer > Levels.
- Review the histogram displayed in the Properties panel.
- Adjust the black point to deepen shadows.
- Adjust the white point to improve highlights.
- Modify the middle slider to control midtone brightness.
Levels can help improve contrast while maintaining greater control over the tonal distribution of your photograph.
Use the Curves Adjustment
Curves provides more precise tonal control than basic brightness adjustments.
A subtle S-shaped curve is commonly used to enhance contrast:
- Slightly lower the shadows.
- Gently raise the highlights.
- Preserve important details in both bright and dark areas.
Avoid aggressive adjustments that make the photograph look unnatural.
Use Camera Raw for Basic Corrections
Photoshop’s Camera Raw provides a convenient environment for adjusting exposure, contrast, highlights, shadows, whites, blacks, texture, clarity, and other image characteristics.
You can access Camera Raw through Filter > Camera Raw Filter when working with supported image layers.
| Adjustment | What It Does |
| Exposure | Controls overall brightness |
| Contrast | Increases or decreases tonal separation |
| Highlights | Controls brighter areas |
| Shadows | Controls darker areas |
| Whites | Adjusts the brightest tonal range |
| Blacks | Adjusts the darkest tonal range |
| Texture | Enhances or softens fine details |
| Clarity | Modifies local contrast |
| Dehaze | Helps reduce atmospheric haze |
| Vibrance | Enhances muted colors while protecting some already saturated colors |
Professional tip: Start with exposure and white balance before adjusting contrast, clarity, or saturation. This creates a more balanced foundation for the remaining edits.
Step 4: Correct White Balance and Improve Colors
Color correction helps photographs appear natural, consistent, and visually appealing.
Incorrect white balance can make an image appear excessively warm, cold, green, or magenta.
How to Correct White Balance
If you are working with a RAW photograph, use the white balance controls in Camera Raw.
- Open the photograph in Camera Raw.
- Locate the Temperature and Tint controls.
- Adjust Temperature to make the image warmer or cooler.
- Adjust Tint to correct green or magenta color casts.
- Review neutral areas of the photograph to evaluate whether the correction looks natural.
For JPEG and other supported image formats, you can use Camera Raw or adjustment layers such as Color Balance and Curves.
Improve Color Saturation
Photoshop provides several ways to enhance colors without making the image look overly processed.
Vibrance: Useful for enhancing less saturated colors while providing some protection to already saturated colors.
Hue/Saturation: Allows you to adjust the saturation, hue, and lightness of individual color ranges.
Color Balance: Helps modify shadows, midtones, and highlights to create a particular color mood.
Selective Color: Offers more detailed control over specific color components, making it useful for commercial and creative editing.
| Editing Goal | Recommended Tool |
| Improve muted colors | Vibrance |
| Correct excessive saturation | Hue/Saturation |
| Create a warm or cool mood | Color Balance |
| Adjust specific colors | Selective Color |
| Improve overall color relationships | Curves |
Always compare your edited image with the original to ensure the colors remain realistic and consistent with your creative objective.
Step 5: Retouch Portraits Using Professional Tools
Portrait retouching is one of the most popular applications of Adobe Photoshop.
The goal of professional retouching is to enhance the photograph while preserving natural skin texture, facial features, and the subject’s original appearance.
Spot Healing Brush
The Spot Healing Brush is useful for removing small imperfections, such as temporary blemishes, dust spots, or minor distractions.
How to use it:
- Select the Spot Healing Brush Tool.
- Adjust the brush size to match the area being corrected.
- Click or paint over the unwanted imperfection.
- Review the result and repeat if necessary.
For a more flexible workflow, use a separate blank layer and enable the appropriate sampling option so the tool can work with the underlying image.
Healing Brush Tool
The Healing Brush gives you greater control over the source area used to repair a photograph.
It is particularly useful for correcting uneven textures, skin imperfections, and areas that require more precise blending.
Clone Stamp Tool
The Clone Stamp Tool copies pixels from one area of an image to another.
It is useful for:
- Removing unwanted objects
- Repairing damaged photographs
- Cleaning distracting background elements
- Correcting repetitive or inconsistent textures
Use a soft brush where appropriate and sample carefully to avoid repeating recognizable patterns.
Professional Portrait Retouching Tips
- Avoid removing every natural skin detail.
- Use smaller brush sizes for precise corrections.
- Work on separate layers whenever possible.
- Avoid excessive smoothing and artificial skin texture.
- Review the photograph at both zoomed-in and full-image views.
- Maintain consistency across multiple photographs from the same shoot.
Step 6: Remove Backgrounds and Isolate Subjects
Background removal is particularly useful for product photography, marketing creatives, portraits, and eCommerce images.
Photoshop offers multiple tools for selecting and isolating subjects.
Select Subject
Photoshop’s Select Subject feature uses automated detection to identify the primary subject in an image.
To use it:
- Open the photograph.
- Navigate to Select > Subject.
- Review the automatically generated selection.
- Refine the selection if required.
- Apply a layer mask to isolate the subject.
Remove Background
The Remove Background option available through relevant Photoshop contextual controls can automatically identify the subject and create a masked result.
This can be useful when you need a quick starting point for background removal.
Select and Mask
The Select and Mask workspace provides additional tools for refining complex selections.
It is especially useful for subjects with:
- Hair
- Fur
- Transparent or semi-transparent edges
- Complex outlines
- Fine details against busy backgrounds
Replace the Background
Once the subject is isolated, you can add a new background.
- Place the background image on a separate layer.
- Move the background layer below the subject layer.
- Adjust its size and position.
- Match the lighting and colors between the subject and background.
- Refine the layer mask to create natural edges.
For realistic compositing, the subject and background should have consistent lighting direction, perspective, color temperature, and shadow characteristics.
Step 7: Use Layers and Masks for Non-Destructive Editing
Layers are one of Photoshop’s most important features.
They allow you to separate different elements of a photograph, making it easier to edit, adjust, and organize your work.
Understanding Photoshop Layers
| Layer Type | Purpose |
| Pixel Layer | Contains image pixels and painted content |
| Adjustment Layer | Applies editable tonal or color adjustments |
| Text Layer | Contains editable typography |
| Shape Layer | Contains vector-based shapes |
| Smart Object | Preserves source content for flexible transformations and supported editing |
| Layer Mask | Controls which areas of a layer are visible |
| Group | Organizes multiple layers together |
What Is a Layer Mask?
A layer mask controls the visibility of a layer without permanently deleting image content.
In a mask:
- White reveals the layer.
- Black conceals the layer.
- Gray partially reveals the layer.
This is particularly useful for background removal, selective color correction, portrait retouching, and blending multiple photographs.
How to Add a Layer Mask
- Select the layer you want to modify.
- Click the Add Layer Mask icon in the Layers panel.
- Select the mask thumbnail.
- Use a brush to reveal or conceal specific areas.
- Refine the mask until the result looks natural.
Best practice: Use masks instead of permanently erasing pixels whenever possible. You can revisit the mask later and modify the edit without starting over.
Step 8: Apply Selective Editing
Selective editing allows you to modify specific parts of a photograph without affecting the entire image.
For example, you may want to brighten a face, darken the background, improve the sky, or enhance the colors of a particular object.
Using Adjustment Layers with Masks
- Create an adjustment layer such as Curves, Levels, or Hue/Saturation.
- Adjust the settings to achieve the desired effect.
- Select the adjustment layer’s mask.
- Use a soft black brush to conceal the effect from unwanted areas.
- Use white to restore the effect where needed.
This approach is useful because you can modify the adjustment settings at any time.
Common Selective Editing Applications
| Editing Task | Suggested Adjustment |
| Brighten a face | Curves or Levels |
| Darken a distracting background | Curves |
| Enhance the sky | Selective color or masked Curves |
| Improve product colors | Hue/Saturation |
| Reduce color distractions | Selective Color |
| Add subtle contrast to a subject | Curves or Camera Raw |
Selective editing can make a photograph more visually engaging while preserving a natural appearance.
Step 9: Enhance Details and Image Sharpness
Sharpening helps improve the perceived definition of edges and details in a photograph.
However, excessive sharpening can introduce halos, noise, and an unnatural appearance.
Use Smart Sharpen
Smart Sharpen provides controls for sharpening strength and reducing certain forms of blur.
To use it:
- Duplicate the image layer or convert it to a Smart Object.
- Navigate to Filter > Sharpen > Smart Sharpen.
- Adjust the Amount and Radius settings.
- Review the image at an appropriate zoom level.
- Apply the effect carefully.
Use Unsharp Mask
Unsharp Mask is another common sharpening tool.
Its primary controls include:
| Control | Function |
| Amount | Controls sharpening intensity |
| Radius | Determines the width of edge enhancement |
| Threshold | Controls how much tonal difference is required before sharpening is applied |
Different images require different sharpening settings. A portrait, landscape, and product photograph should not necessarily receive the same treatment.
Reduce Noise
Noise reduction is useful for photographs captured in low-light conditions or at higher ISO settings.
Photoshop’s Camera Raw includes noise reduction controls for supported images. Use them carefully because excessive noise reduction can remove fine details and make photographs appear overly smooth.
Step 10: Use Adobe Photoshop AI Features
Adobe Photoshop increasingly incorporates AI-powered tools that help users perform complex editing tasks more efficiently.
These features can assist with removing distractions, expanding compositions, generating new visual elements, and improving editing workflows.
Generative Fill
Generative Fill allows you to modify selected areas of an image using text prompts and Adobe’s supported generative AI technology.
Typical applications include:
- Adding objects to a photograph
- Replacing selected elements
- Removing unwanted distractions
- Extending a background
- Creating alternative visual compositions
How to use Generative Fill:
- Open your photograph.
- Select the area you want to modify.
- Choose Generative Fill from the available contextual controls.
- Enter a descriptive prompt if you want to add or replace content.
- Generate the result.
- Review the available variations.
- Select the result that best fits the image.
Generative Fill results should always be reviewed carefully, particularly when editing commercial photographs, product images, or images that must accurately represent real-world objects.
Generative Expand
Generative Expand helps extend an image beyond its original boundaries.
This is particularly useful when:
- A photograph needs additional space for a banner.
- The original composition is too tight.
- You need a different aspect ratio.
- A subject must be repositioned within a larger canvas.
Remove Tool
The Remove Tool can help eliminate unwanted objects or distractions from photographs.
It is useful for cleaning backgrounds, removing minor visual interruptions, and improving the overall composition.
AI Features and Professional Responsibility
AI-assisted editing can save time, but professional editors should remain aware of its limitations.
For product photography, journalism, documentary photography, and other accuracy-sensitive work, generated changes may be inappropriate or require disclosure.
Always review generated content for visual inconsistencies, distorted details, and unintended changes.
Step 11: Create Professional Color Grading
Color grading is the process of adjusting the overall color appearance of an image to establish a specific visual style or mood.
It is commonly used in fashion photography, travel photography, advertising, portraits, and cinematic visuals.
Popular Color Grading Techniques
Warm Color Grading
Useful for creating a welcoming, golden, or sunlit appearance. Often involves subtle adjustments toward warmer highlights.
Cool Color Grading
Can create a clean, calm, modern, or dramatic appearance through controlled cooler tones.
Cinematic Color Grading
Often combines carefully balanced highlights, shadows, contrast, and color relationships to create a distinctive visual atmosphere.
Natural Color Grading
Focuses on realistic skin tones, balanced contrast, and subtle enhancements that maintain the photograph’s original character.
Tools for Color Grading
| Tool | Application |
| Color Balance | Adjust colors in shadows, midtones, and highlights |
| Curves | Control tonal contrast and individual color channels |
| Selective Color | Refine specific color components |
| Hue/Saturation | Modify color intensity and hue |
| Camera Raw Color Grading | Add controlled color tones to tonal ranges |
| Gradient Map | Create stylized color relationships |
The best color grading is not necessarily the most dramatic. A consistent and restrained approach often produces more professional results.
Step 12: Edit Product Photography for eCommerce
Product photography requires a slightly different editing approach from portrait or landscape photography.
The primary objective is to present products clearly, accurately, and attractively while maintaining consistency across the catalog.
Essential Product Photo Editing Tasks
Background Cleaning: Remove distracting elements and create a clean, consistent background.
Color Accuracy: Ensure the product’s color closely matches the real item.
Exposure Correction: Improve visibility without losing details in highlights or shadows.
Dust and Imperfection Removal: Clean up small distracting marks when appropriate.
Image Alignment: Ensure products are positioned consistently across the catalog.
Shadow Enhancement: Create or refine natural shadows when needed to improve depth.
Product Photography Editing Workflow
| Step | Action |
| 1 | Import the original photograph |
| 2 | Correct exposure and white balance |
| 3 | Crop and align the product |
| 4 | Remove or clean the background |
| 5 | Retouch dust and minor imperfections |
| 6 | Adjust colors while preserving accuracy |
| 7 | Apply appropriate sharpening |
| 8 | Resize and export for the intended platform |
For eCommerce websites, consistency across product images is just as important as the quality of individual photographs.
Step 13: Save and Export Your Edited Photograph
Once editing is complete, select the correct file format based on your intended use.
Save an Editable Photoshop File
Go to File > Save As and save your project as a PSD file.
A PSD file preserves supported editing elements, including layers, masks, adjustment layers, and other project components.
Keep the PSD as your master file if you expect to make further edits.
Export for Websites and Social Media
Use File > Export > Export As or another suitable export option.
| Format | Best For |
| JPEG | Photographs for websites, blogs, and social media |
| PNG | Graphics requiring transparency |
| WebP | Web images where supported by the publishing workflow |
| TIFF | High-quality print and professional imaging workflows |
| PSD | Editable Photoshop project |
Important Export Considerations
- Choose the correct dimensions for your intended platform.
- Avoid unnecessary upscaling.
- Use appropriate compression to balance image quality and file size.
- Convert to the appropriate color profile, commonly sRGB for web delivery.
- Check the final image on different screen sizes.
- Keep a high-quality master file for future revisions.
For websites, optimized image sizes and file formats can help improve loading speed and user experience.
Adobe Photoshop Photo Editing Workflow: Quick Reference
The following workflow provides a practical starting point for editing most photographs professionally.
| Step | Editing Process | Recommended Approach |
| 1 | Import | Open the RAW or original image |
| 2 | Preparation | Duplicate the original or use a Smart Object |
| 3 | Composition | Crop and straighten |
| 4 | Basic corrections | Adjust exposure and white balance |
| 5 | Tonal editing | Use Levels or Curves |
| 6 | Color correction | Adjust Vibrance, Hue/Saturation, or Color Balance |
| 7 | Retouching | Correct imperfections with appropriate tools |
| 8 | Selective editing | Use adjustment layers and masks |
| 9 | Detail enhancement | Apply sharpening and noise reduction |
| 10 | Creative editing | Add controlled color grading |
| 11 | Final review | Check details, colors, and visual consistency |
| 12 | Export | Save the PSD and export the final image |
This workflow provides a foundation, but the exact order and tools may vary depending on the photograph and desired outcome.
Adobe Photoshop Photo Editing: Common Mistakes to Avoid
Even experienced users can make editing mistakes that reduce image quality.
1. Overusing Saturation
Excessive saturation can make photographs look artificial and can cause color details to disappear.
Solution: Use Vibrance or selective color adjustments and review the image at different zoom levels.
2. Excessive Skin Smoothing
Over-retouching can remove natural skin texture and make portraits appear unrealistic.
Solution: Focus on correcting temporary imperfections while preserving natural facial details.
3. Making Permanent Edits Too Early
Directly editing the original image or repeatedly applying destructive changes can make revisions difficult.
Solution: Use Smart Objects, adjustment layers, and layer masks.
4. Ignoring Image Resolution
Upscaling a low-resolution image does not automatically restore missing details.
Solution: Start with the highest-quality source available and resize according to the final output requirements.
5. Applying the Same Settings to Every Image
Different photographs have different lighting conditions, colors, and exposure characteristics.
Solution: Develop a consistent editing style but adjust settings individually for each photograph.
6. Sharpening Too Aggressively
Excessive sharpening creates visible halos and emphasizes noise.
Solution: Apply sharpening selectively and review the image at an appropriate zoom level.
7. Ignoring Color Accuracy
Color changes can be particularly problematic for product photography and commercial images.
Solution: Compare edited colors with the original and use a suitable color-managed workflow.
Adobe Photoshop Tips for Professional Photo Editing
Here are some practical tips that can help improve your editing efficiency and results.
- Use keyboard shortcuts: Learn commonly used shortcuts for tools, zooming, and layer management.
- Work with Smart Objects: Preserve flexibility when resizing, transforming, or applying supported filters.
- Use adjustment layers: Make color and tonal corrections editable.
- Organize your layers: Rename layers and group related edits.
- Use masks for selective editing: Avoid permanently erasing important image content.
- Compare before and after: Regularly review the original image to prevent over-editing.
- Maintain a consistent style: Especially when editing images for the same brand or campaign.
- Review images at different zoom levels: Check fine details and overall composition.
- Keep original files: Preserve source images and editable projects for future use.
- Optimize exported images: Balance quality and file size for web publishing.
Adobe Photoshop vs Adobe Lightroom for Photo Editing
Adobe Photoshop and Adobe Lightroom are both popular applications for professional photography, but they serve different purposes.
| Feature | Adobe Photoshop | Adobe Lightroom |
| Primary Purpose | Advanced image editing and manipulation | Photography workflow and image management |
| Layer-Based Editing | Extensive | Limited compared with Photoshop |
| Detailed Retouching | Advanced | More basic |
| Background Replacement | Extensive tools and masking | More limited |
| Color Correction | Highly detailed and flexible | Excellent photography-focused controls |
| Batch Editing | Available through actions and other workflows | Strong workflow for processing multiple images |
| Photo Organization | Basic file and project organization | Extensive cataloging and photo management |
| Best For | Complex editing, retouching, compositing | Managing and developing large photo collections |
Which one should you choose?
Lightroom is often a convenient starting point for photographers who regularly process large numbers of images and need efficient organization.
Photoshop is more suitable when you need detailed retouching, object removal, compositing, advanced masking, or creative manipulation.
Many professional photographers use both applications as part of the same workflow.
Who Should Learn Adobe Photoshop?
Photoshop is useful for a wide range of creative professionals.
Photographers
Photographers can use Photoshop to retouch portraits, enhance landscapes, correct exposure, and refine photographs for clients.
Graphic Designers
Graphic designers can create promotional visuals, advertising creatives, compositions, and digital artwork using photographs and graphic elements.
Digital Marketers
Digital marketers can prepare campaign visuals, website banners, product images, and social media creatives.
eCommerce Professionals
Online store owners and eCommerce teams can improve product presentation, maintain catalog consistency, and prepare optimized images.
Content Creators
Bloggers, YouTubers, and social media creators can use Photoshop to create thumbnails, promotional images, and branded content.
Students and Beginners
Students interested in photography, graphic design, digital marketing, or creative careers can develop valuable practical skills by learning Photoshop.
Is Adobe Photoshop Worth Learning for Professional Photo Editing?
Yes. Adobe Photoshop remains a valuable skill for anyone interested in professional image editing, photography, graphic design, and digital content creation.
Its combination of advanced editing tools, layer-based workflows, precise masking, and AI-assisted features makes it suitable for both traditional photography workflows and modern creative projects.
However, Photoshop is not the only application you need to learn. Depending on your goals, combining Photoshop with Lightroom, Illustrator, Premiere, or other creative applications can help you develop a more comprehensive skill set.
The most important factor is understanding how to use the tools effectively rather than relying on filters or automated features alone.
Frequently Asked Questions (FAQs)
1. Is Adobe Photoshop good for professional photo editing?
Yes. Adobe Photoshop offers advanced retouching, color correction, layer-based editing, masking, compositing, and AI-assisted tools that make it suitable for professional photography and commercial image editing.
2. Is Photoshop easy to learn for beginners?
Photoshop has a learning curve because it includes many tools and features. Beginners can start with basic cropping, exposure correction, color adjustment, and retouching before moving to advanced editing techniques.
3. How do I edit a photo in Adobe Photoshop?
Open the image, crop it, correct exposure and white balance, adjust colors, retouch imperfections, refine details, and export the final photograph in the appropriate format. Using adjustment layers and masks helps maintain editing flexibility.
4. What is the best Photoshop tool for photo retouching?
The best tool depends on the task. The Spot Healing Brush works well for small imperfections, the Healing Brush provides more control, and the Clone Stamp Tool is useful for copying image details from one area to another.
5. How can I remove a background in Photoshop?
Use Select Subject or the Remove Background option to create an initial selection. Refine the result using Select and Mask, then apply a layer mask to isolate the subject.
6. What is non-destructive editing in Photoshop?
Non-destructive editing allows you to modify photographs without permanently changing the original image pixels. Smart Objects, adjustment layers, and layer masks are commonly used for this purpose.
7. Can Photoshop improve low-quality photographs?
Photoshop provides sharpening, noise reduction, image resizing, and certain AI-assisted enhancement capabilities. However, it cannot reliably restore all information missing from a severely blurred or low-resolution original.
8. What is the difference between Photoshop and Lightroom?
Photoshop is designed for advanced image editing, retouching, compositing, and manipulation. Lightroom focuses more on photo organization, RAW development, and efficient processing of large photography collections.
9. Can I use Photoshop AI tools for photo editing?
Yes. Features such as Generative Fill, Generative Expand, and the Remove Tool can assist with image editing. Their availability and capabilities depend on the Photoshop version, account, and applicable Adobe plan.
10. Which file format is best for saving edited photos?
PSD is suitable for retaining an editable Photoshop project. JPEG is commonly used for photographs published online, while TIFF is useful for certain professional and print workflows. PNG is preferable when transparency is required.
Final Thoughts
Adobe Photoshop is a powerful application for professional photo editing, offering extensive control over image composition, exposure, colors, retouching, background removal, and creative manipulation.
The best way to learn Photoshop is to practice with real photographs and develop a structured editing workflow. Start with basic corrections, gradually introduce layers and masks, and then explore advanced retouching, color grading, and AI-assisted features.
With consistent practice, Photoshop can help you produce more polished photographs, improve your creative skills, and expand your opportunities in photography, graphic design, digital marketing, and content creation.
Ready to explore more creative tools? Visit NextBloggers for tutorials, software reviews, and practical guides that help you make better decisions about the tools you use.
Leave a Reply